This article was initially published in the AWS Community Builders’ dev.to.
In my last articles, I realized direct integrations between Unity3D and AWS using the AWS SDK for .NET. I generally don’t dive into details about how the connection between Unity3D and the AWS services is made in order to focus on the primary topic. Still, it deserves a whole article because it’s not that simple!
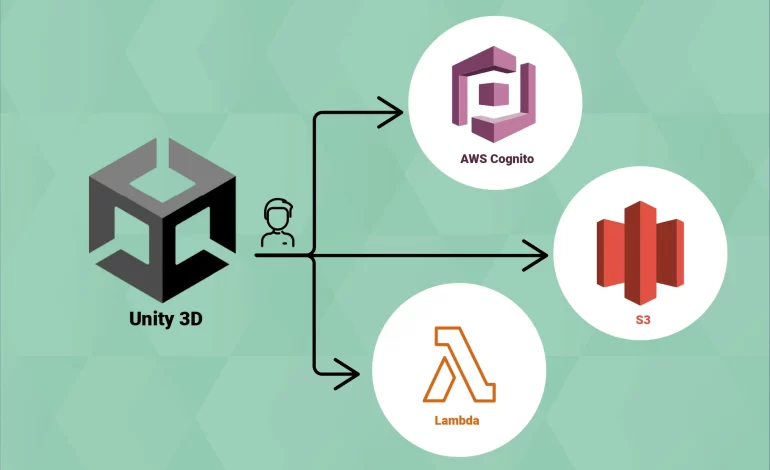
There are many ways to access AWS resources from Unity. In this article, I will summarize three of them: using an IAM user, using a Cognito guest user, and using a Cognito authenticated user.
General considerations: For this article, we will use the AWS SDK for .NET. Since Unity uses .NET Standard 2.1, you will need the .NET Standard 2.0 assemblies available here and unzip the file in your Unity project’s Plugins folder. Since we will perform asynchronous calls, you will also need the AsyncInterfaces package.
If you prefer to watch a video instead of reading this article, here you have!
1. Using an IAM User
Suppose you want to allow a specific user (i.e., a third-party app) to upload files to one of your S3 buckets. However, you only want to give programmatic access without implementing a signup or login flow. Using an IAM user is a perfect fit in this case.

Let’s simulate the process:
– In the S3 console, create a new S3 private bucket. I will call mine awsresourcesbucket.

– In the IAM console, create an IAM user with programmatic access and create a new Access Key; you will be given an Access Key and a Secret Access Key. Once created, don’t forget to copy the Secret Access Key. It is shown just one time!

– Attach a new policy to the IAM user. The policy gives the required permissions to write into the S3 bucket.

– In Unity, build an S3 Client thanks to the IAM user’s Access Key and Secret Access Key, and upload the file.
Comments about the above code:
– We use the NativeGallery package to pick an image from the device.
– We use the PutObjectAsync function as described in the AWS documentation.
– The function UploadFileAsync is asynchronous; you can call it with the await operator inside an async function.
2. Using a Cognito Guest User
You may remember my last article, where I built a real-time multiplayer game with Unity3D and Amazon GameLift. The Unity client calls a Lambda function to start playing, and we want that everybody who has downloaded the game can play without being logged in. You can achieve it using guest users of a Cognito Identity Pool.

Let’s simulate it:
– In the Lambda console, create a simple Lambda function returning a dummy value (I will call it `awsResourcesFunction`). I will do it in Python, but it’s up to you to choose your favorite programming language.

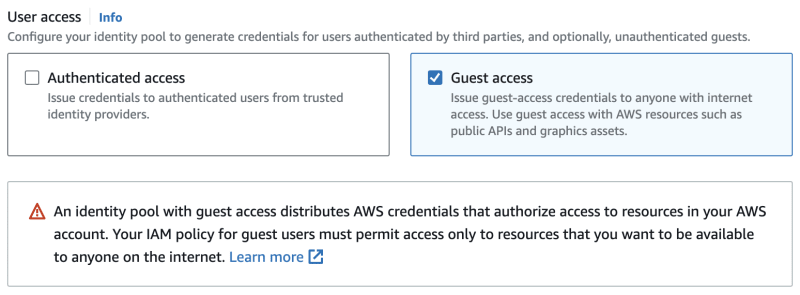
– In the Cognito console, create a Cognito Identity Pool with guest access. During the Pool creation, you will be asked to create a new guest role; I will call them respectively awsResourcesIdentityPool and awsResourcesCognitoRole.


– Once the Identity Pool is created, enter the guest role and attach a new policy. The policy gives the required permissions to invoke the Lambda function we have created before.

– In Unity, we first build the AWS Credentials thanks to the Identity Pool ID and then the Lambda Client with those credentials.
Comments about the above code:
– The AWS documentation indicates that the function InvokeAsync has been deprecated, but remember that we are using the .NET Standard 2.0 assemblies, so it’s valid for us!
– The InvokeAsync function is asynchronous; you can call it with the await operator inside an async function.
3. Using a Cognito Authenticated User
Now imagine that you want to allow the players of your game to upload a profile picture, but you require a login to do it. This case is a bit more complex because your game will handle guest and authenticated users. You can achieve it by creating a User Pool and adding authenticated access to our Identity Pool.

Let’s try:
– In the Cognito console, create a new User Pool. You also be asked to create an Application Client during the User Pool creation. Don’t forget to enable the ALLOW_USER_PASSWORD_AUTH as authentication flow.

– For this example, we assume we already have a user registered and confirmed. Please take a look at this article of mine to learn how to do it.

– Then, go back to the Identity Pool we created before, click on “Add identity provider” of the Authenticated access section, choose “Amazon Cognito User Pool”, and link the Cognito User Pool we have created previously.

– Go then to “Edit role”, create a new role, and attach a new policy to the role (or you can reuse the policy we created for the IAM User). The policy gives the required permissions to write into the S3 bucket.

– In Unity, we first login to the Cognito User Pool with the user Credentials; a Token ID is returned. Then we build the AWS Credentials thanks to the Identity Pool ID, and we add the login data to the AWS Credentials: the `Token ID` and the User Pool Provider Name. We can finally build the S3 Client with the AWS Credentials and upload a file.
Comments about the above code:
– We log in to the Cognito User Pool thanks to the InitiateAuthAsync function.
– We add the login data to the AWS Credentials thanks to the AddLogin function.
– The Provider Name is the concatenation of the following: cognito-idp + region + .amazonaws.com/ + Cognito User Pool ID.
Final Thoughts
Connecting Unity3D with AWS services is challenging work; I hope that this article could help you!
All ids and tokens shown in this article are fake or expired; if you try to use them, you will not be able to establish any connections.
Every code of this article has been tested using Unity 2021.3.3 and Visual Studio Community 2022 for Mac. The mobile device I used to run the Unity app is a Galaxy Tab A7 Lite with Android 11.
A special thanks to Gianca Chavest for designing the fantastic illustration.


