This article was initially published on my Medium Page.
You are talented with Unity and game creation in general, and it’s time for you to move up a gear by creating a real-time multiplayer game, but you have no idea how to do it, and you know very little about cloud computing. Don’t worry, we will see how to do it step by step.
This article is based on the excellent tutorial by Chris Blackwell. Please take a look at it!
Disclaimer: This is not an article about game design. I will focus on the technical aspect of creating a real-time multiplayer game.
Here is the final result:
Preamble
When one starts to work on a real-time multiplayer game, a lot of questions come to mind:
How can I match the players in one or multiple rooms (game sessions)? How can my players communicate together? How can I achieve to have a very low latency for my game?
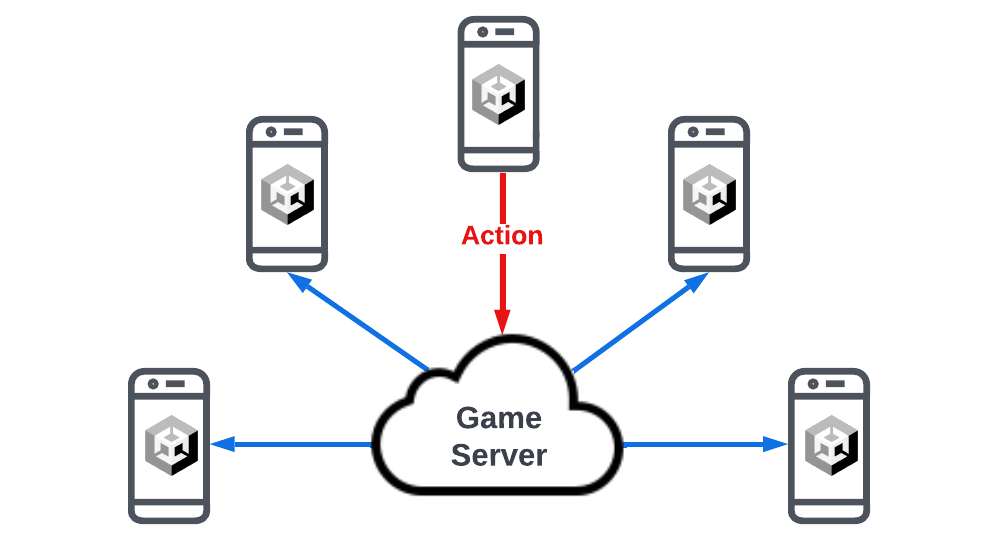
Short answer: Amazon GameLift.
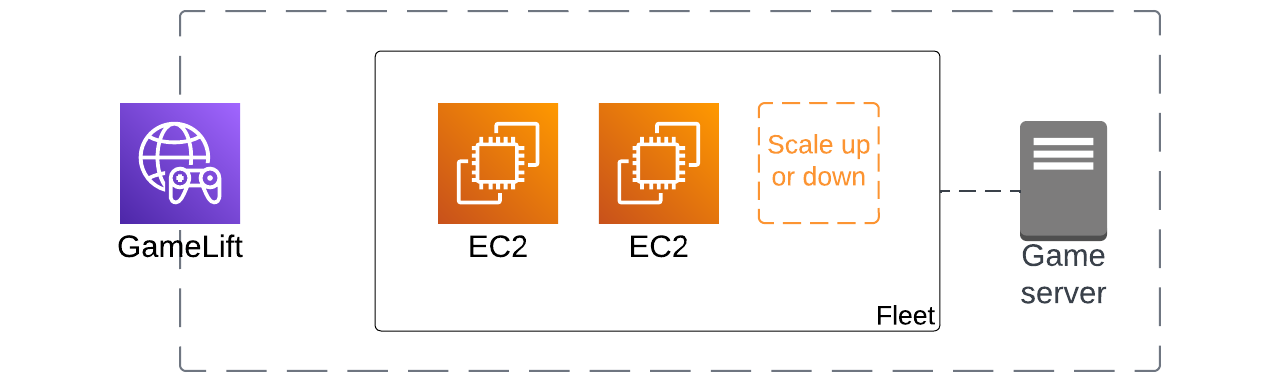
Amazon GameLift is a managed service for multiplayer games with the following characteristics:
- It deploys a set of EC2 instances (fleet) for you, so you won’t have to worry about mounting EC2 instances, securing them, etc.
- It operates the EC2 instances for you: you will never connect to the instances nor install anything. A game server is automatically set up when you run a new GameLift fleet.
- It scales the service for you. No matter how many users your game is played by, GameLift automatically scales up or down according to the demand.
- It connects the players through the game server, creating game and player sessions.
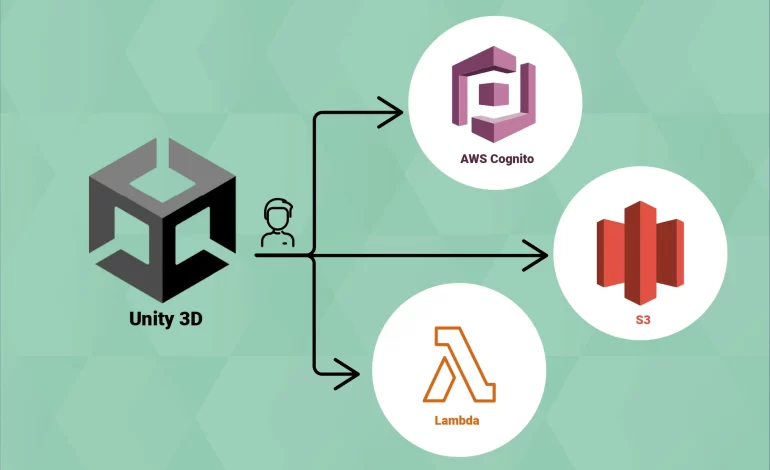
The Architecture
We can achieve building a real-time multiplayer game with few components. Here is our architecture:
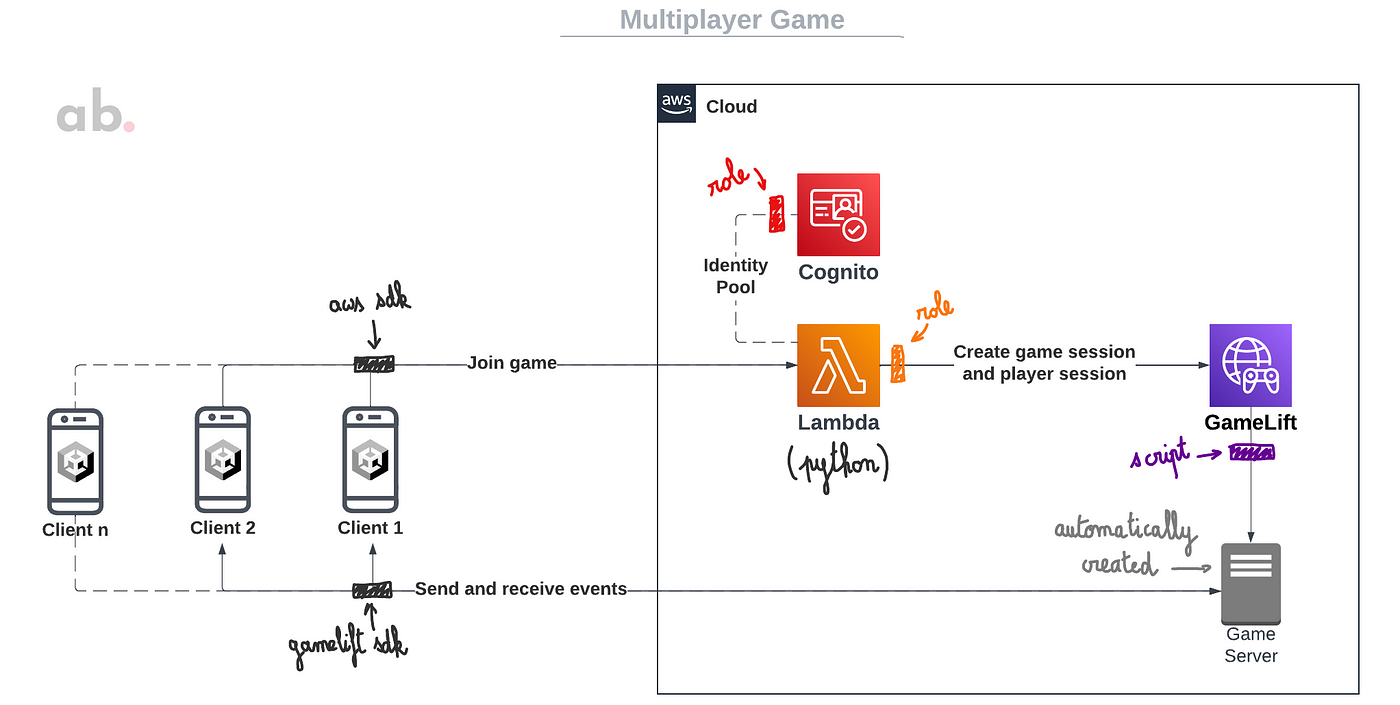
This is how it works:
- The client (Unity application on a mobile device) joins the game by calling a Lambda function.
- The Lambda function indicates GameLift to create a new game session if no game session is available and to create a new player session. The function returns the necessary information to connect to the game server (IP, port, credentials, etc.).
- The client establishes a new connection with the game server, and the user is ready to play.
Lambda
The Lambda function (Python 3.10) will work directly with GameLift and will have the following behavior:

The origin tutorial exposed a Node.js function, but since I’m a Python guy, I rewrote the function in Python. You can find the whole function in the last section of this article.
Also, the Lambda function needs the following permissions to access the GameLift service: CreateGameSession, DescribeGameSessionDetails, CreatePlayerSession, and SearchGameSessions. You can create a new manage IAM policy with those permissions and add it to the Lambda function role.
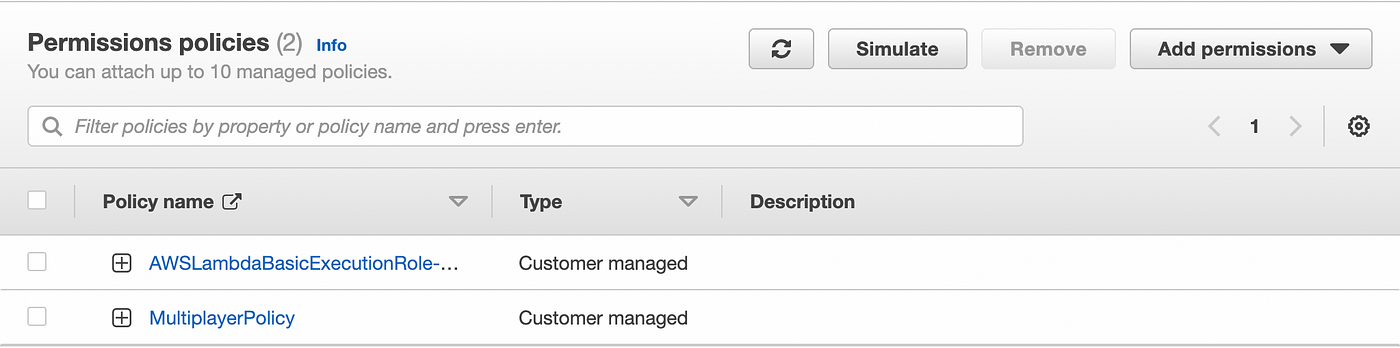
You can find the policy at the end of this article.
Cognito
In previous articles of mine, I performed user authentication through IAM users or Cognito User Pools. We don’t need user authentication this time: we will use guest access to avoid any restrictions; everyone who downloads our game can play immediately.
In this opportunity, the Unity client invokes a Lambda function, and the best way to give access to AWS resources without credentials (guest access) is through a Cognito Identity Pool. A Cognito Identity Pool allows both authenticated and guest users, so if you want to enable some authentication feature in the future (for example, linking users’ Facebook or Twitter accounts to save game progress), you could do it easily.
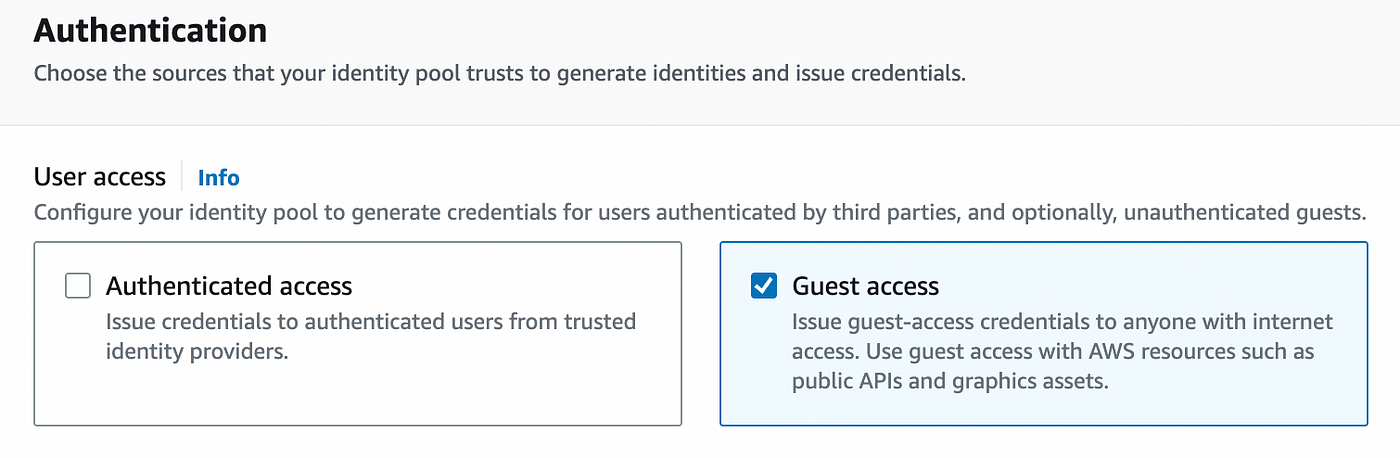
We must attach the necessary permissions (Lambda Invoke) to the Identity Pool we created. You can edit the guest role associated with the Identity Pool and create a new policy to achieve it. You can find the policy at the end of this article.
GameLift
Before running a new GameLift fleet, we need to elaborate a script that will be attached to the fleet. The first step is defining the behavior of the game server. This is how a game session will be managed:

Based on the above flow, we can write and upload a JavaScript script to GameLift. Then, we can create a new fleet and include our script during the fleet creation. Check the end of this article for the script.


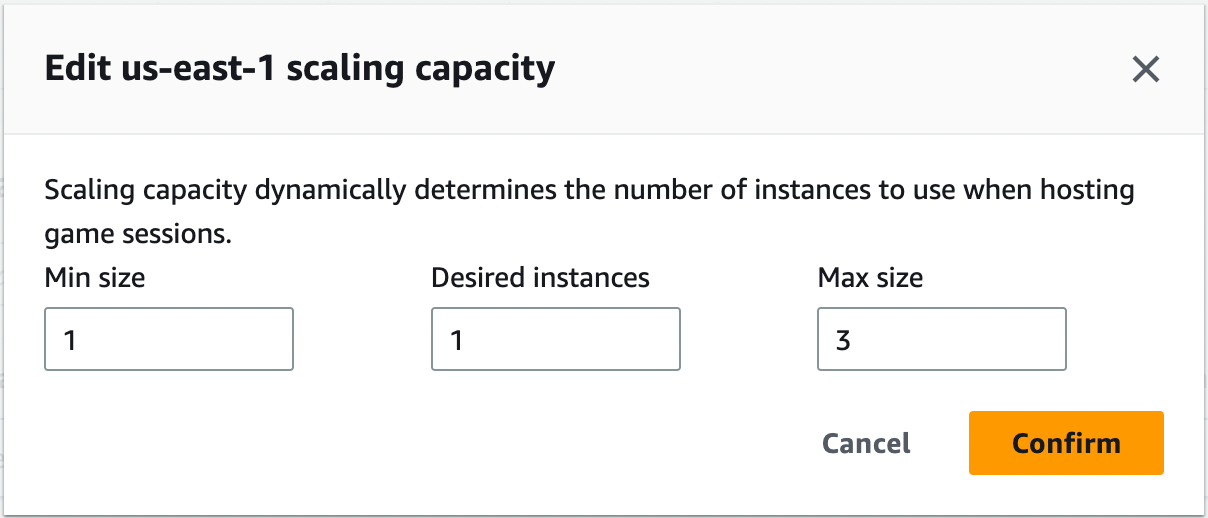
Before configuring the auto-scaling of your fleet, you need first set limits for it. Imagine that your game has an unexpected success; you don’t want to run out of budget in a few days! In the scaling capacity section, you can set a minimum and a maximum of instances for your fleet:
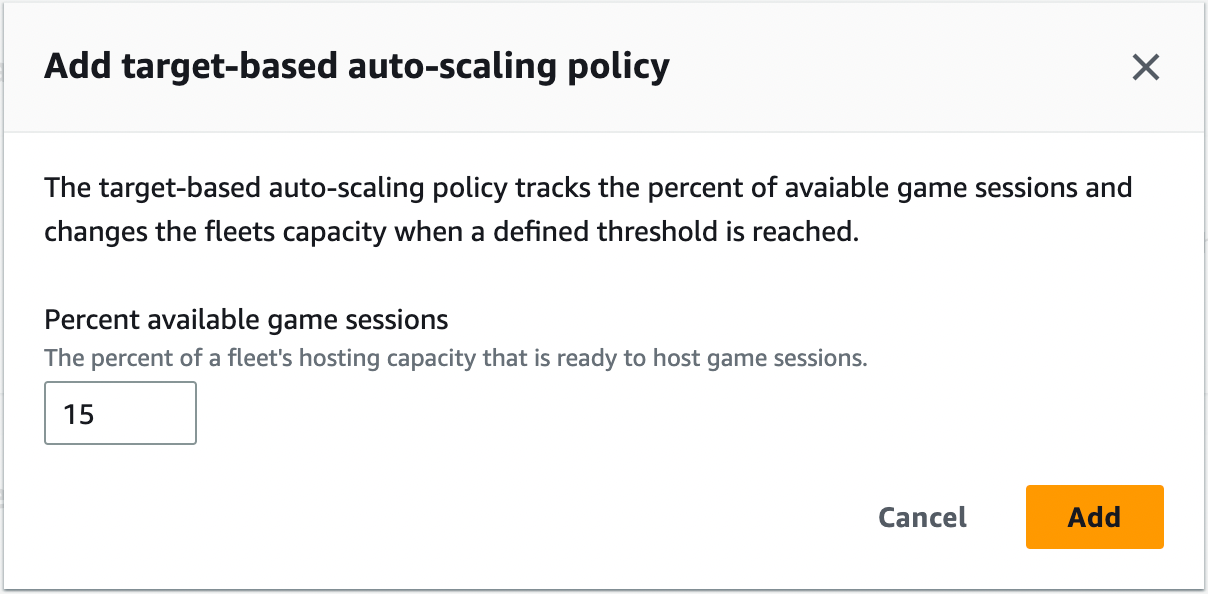
Now, let’s create an auto-scaling policy. An EC2 instance usually takes one or two minutes to start and can inconvenience the players joining the game. Furthermore, it’s better to start an instance preventively before reaching the player limit:
You can see how many available instances you have for your fleet here and request a limit increase here if necessary. In my case, I had only one available instance for my fleet (c4.large); the support team gently increased the limit to 15.
Unity
The plugins
We will integrate the Unity client directly with a Lambda function, so we need some AWS classes and functions. In the original tutorial, Chris Blackwell recommends using the AWS Mobile SDK for Unity to achieve it. Unfortunately, the AWS Mobile SDK for Unity has been deprecated, and Amazon recommends now using the AWS SDK for .NET. Let’s see.
In previous articles, I recommended downloading the AWS packages on NuGet.org, the official package manager for .NET. Although it could work, the Amazon documentation recommends doing it here for Unity. Since Unity uses .NET Standard 2.1, download and unzips the .NET Standard 2.0 zip file (it also supports 2.1).
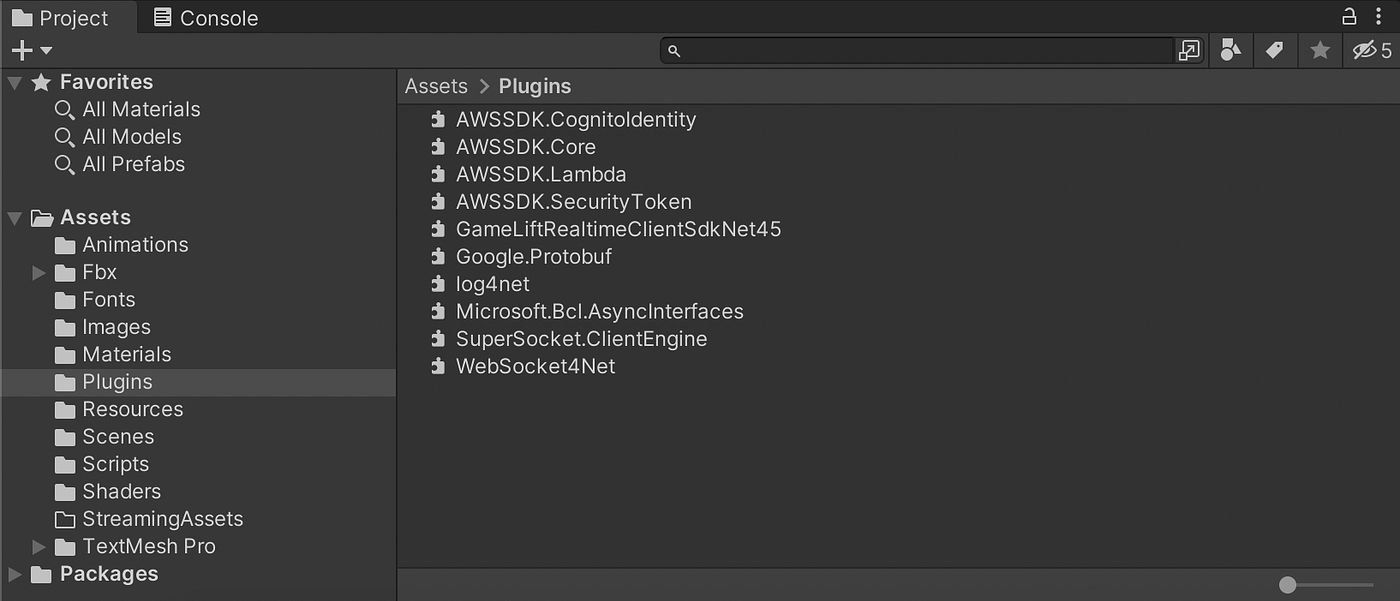
Then, copy the following DLL files to the Plugins folder of your Unity project: AWSSDK.Core, AWSSDK.Lambda, AWSSDK.CognitoIdentity, and AWSSDK.SecurityToken. The Lambda function call is asynchronous, so you also need the Microsoft AsyncInterfaces package.

Then, we will need an extra plugin to connect to the game server: the GameLift Realtime Client SDK. Go to the GameLift page and download it. Once unzipped, you can figure out this is a whole .NET project. Open the project with Visual Studio and compile it. Five DLL files will be generated: GameLiftRealtimeClientSdkNet45.dll, Google.Protobuf.dll, log4net.dll, SuperSocket.ClientEngine.dll, and WebSocket4Net.dll. Move those DLL files to the Plugins folder of your Unity project.
Characters and animations
Since I’m not a designer or a 3D modeler, I had to look for a third party who could provide the animations I needed for my Unity project. I found out that Mixamo has a lot of fantastic free characters and animations.
I tried it by downloading the character Remy as an FBX file for Unity and moved it to my Unity project.
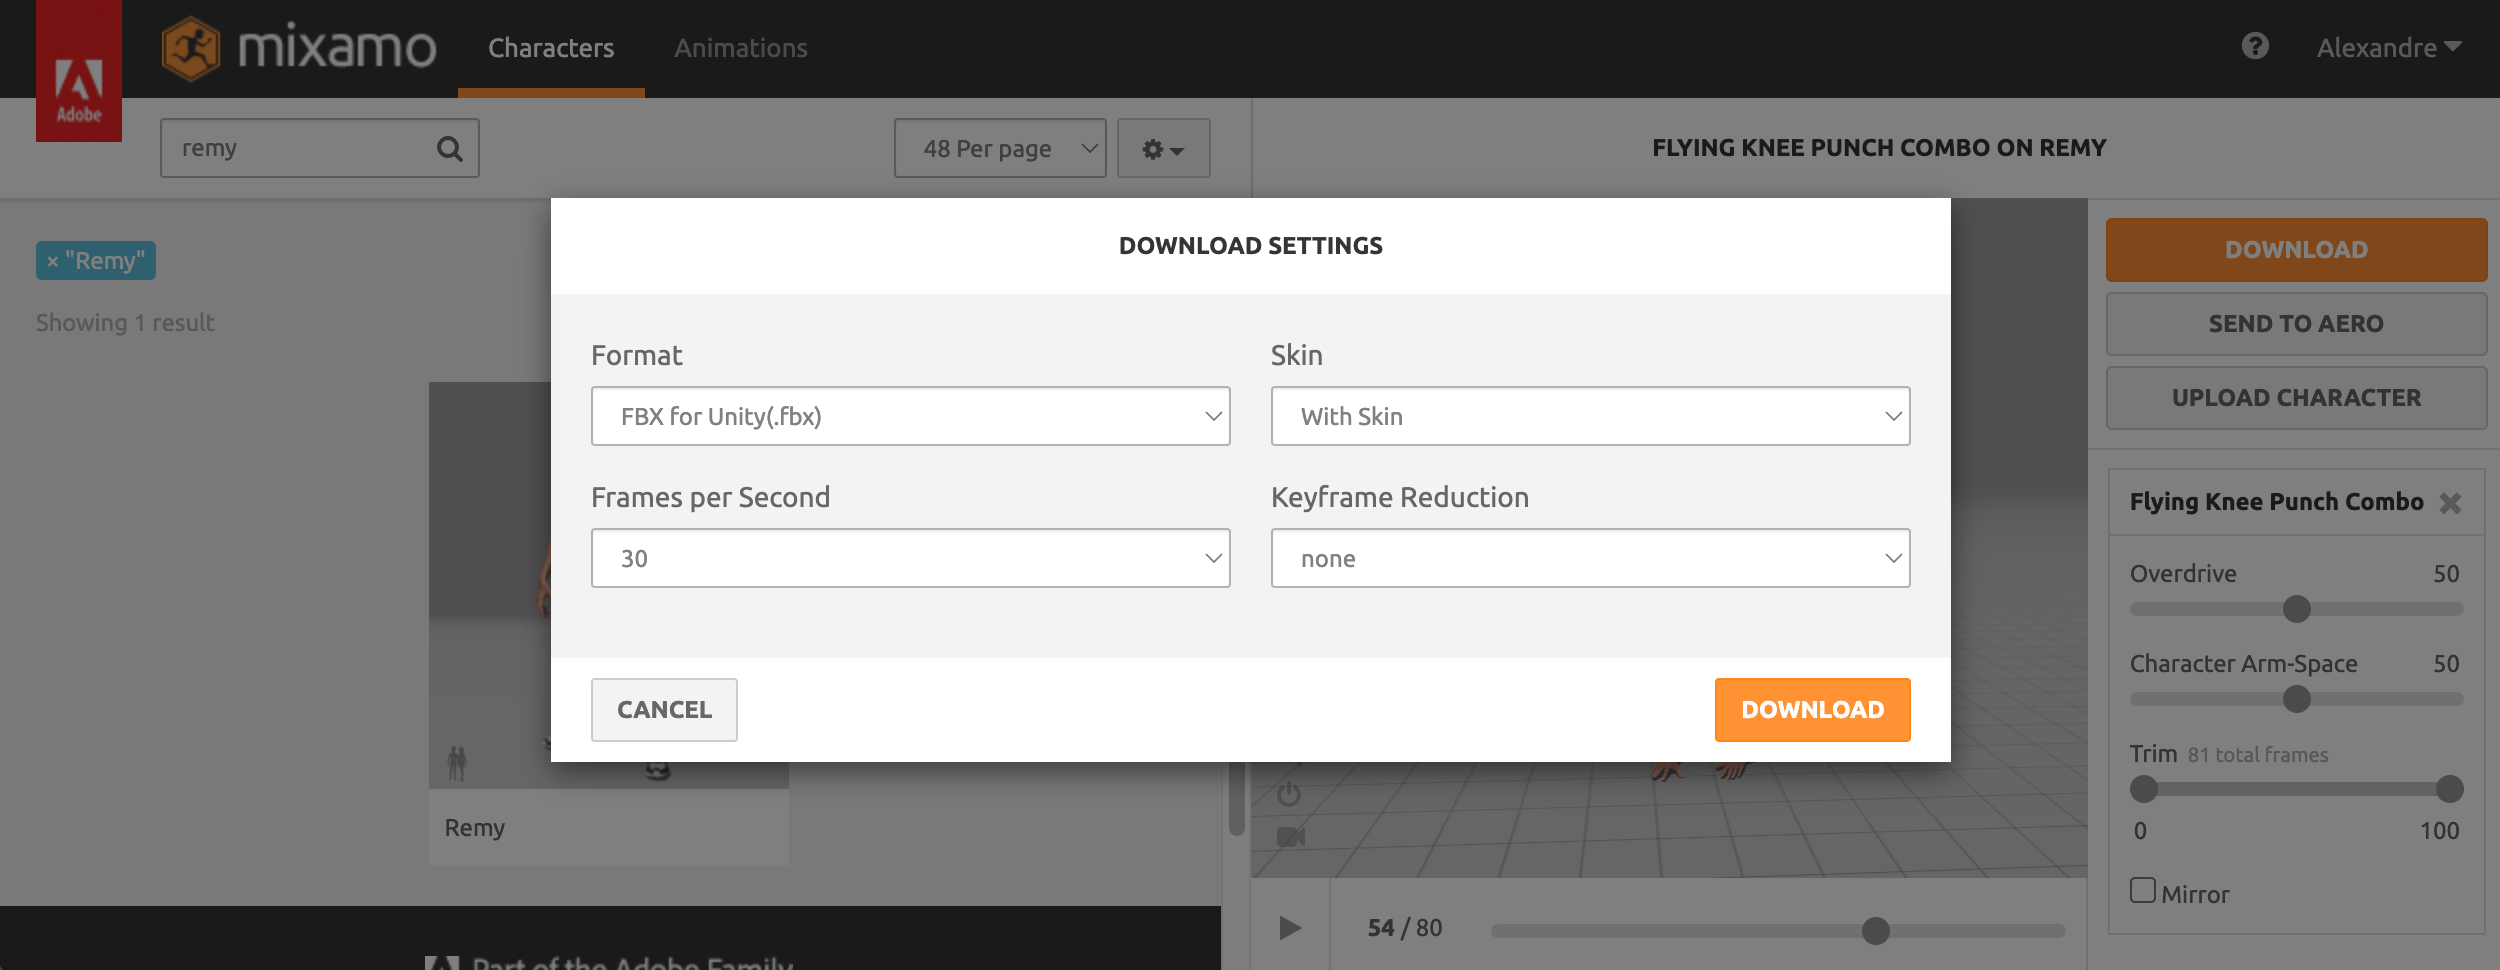
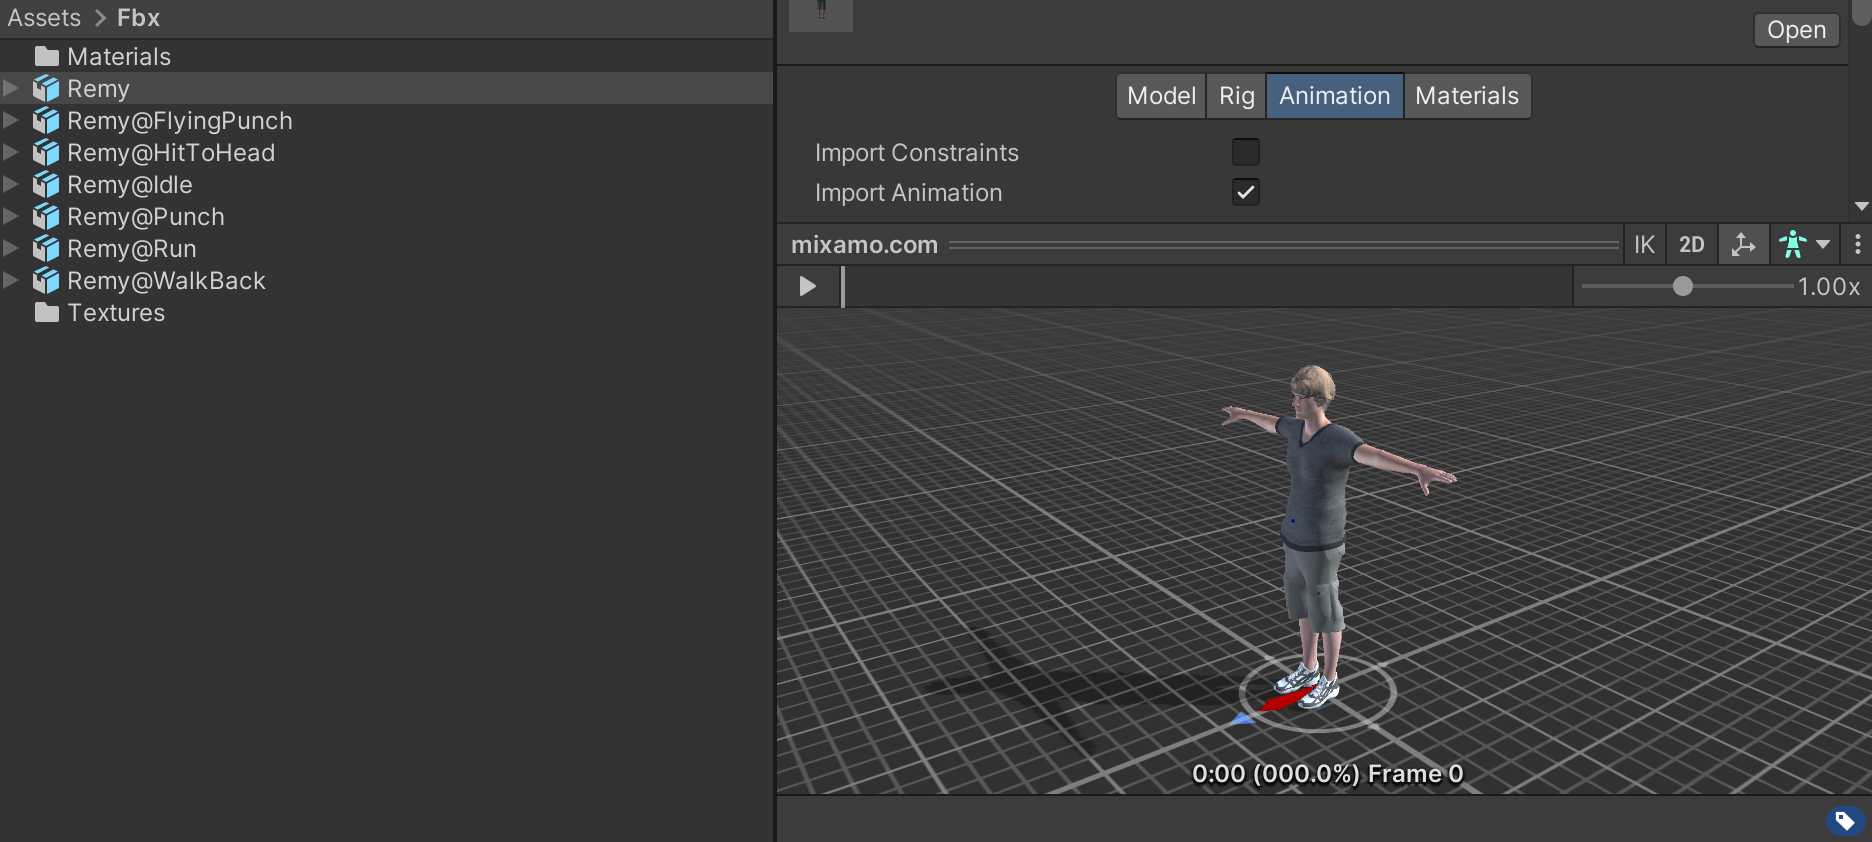
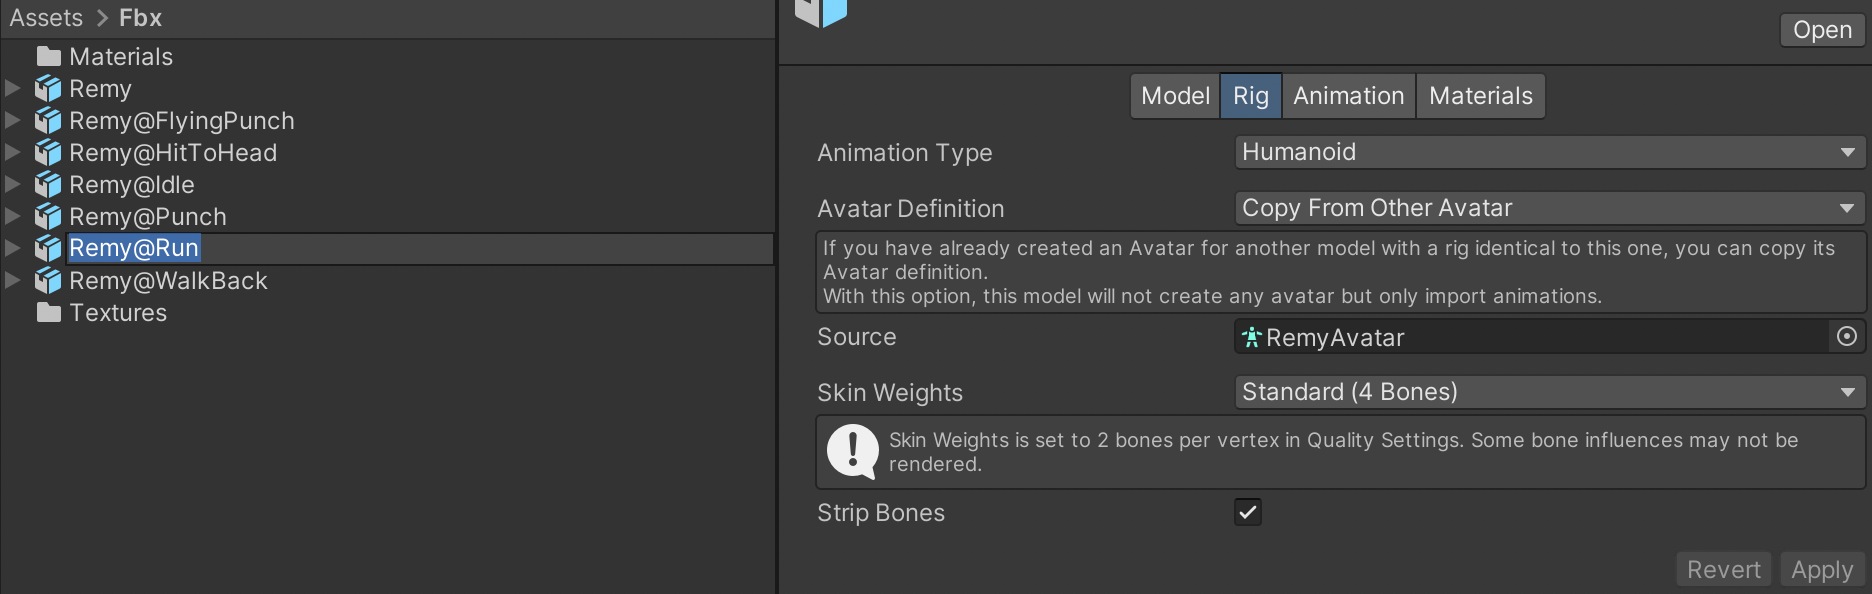
It looks good! After that, I downloaded multiple animations to give life to Remy. The animations should be downloaded without skin. We indicate the animation in the editor to use the character’s skin we previously downloaded.

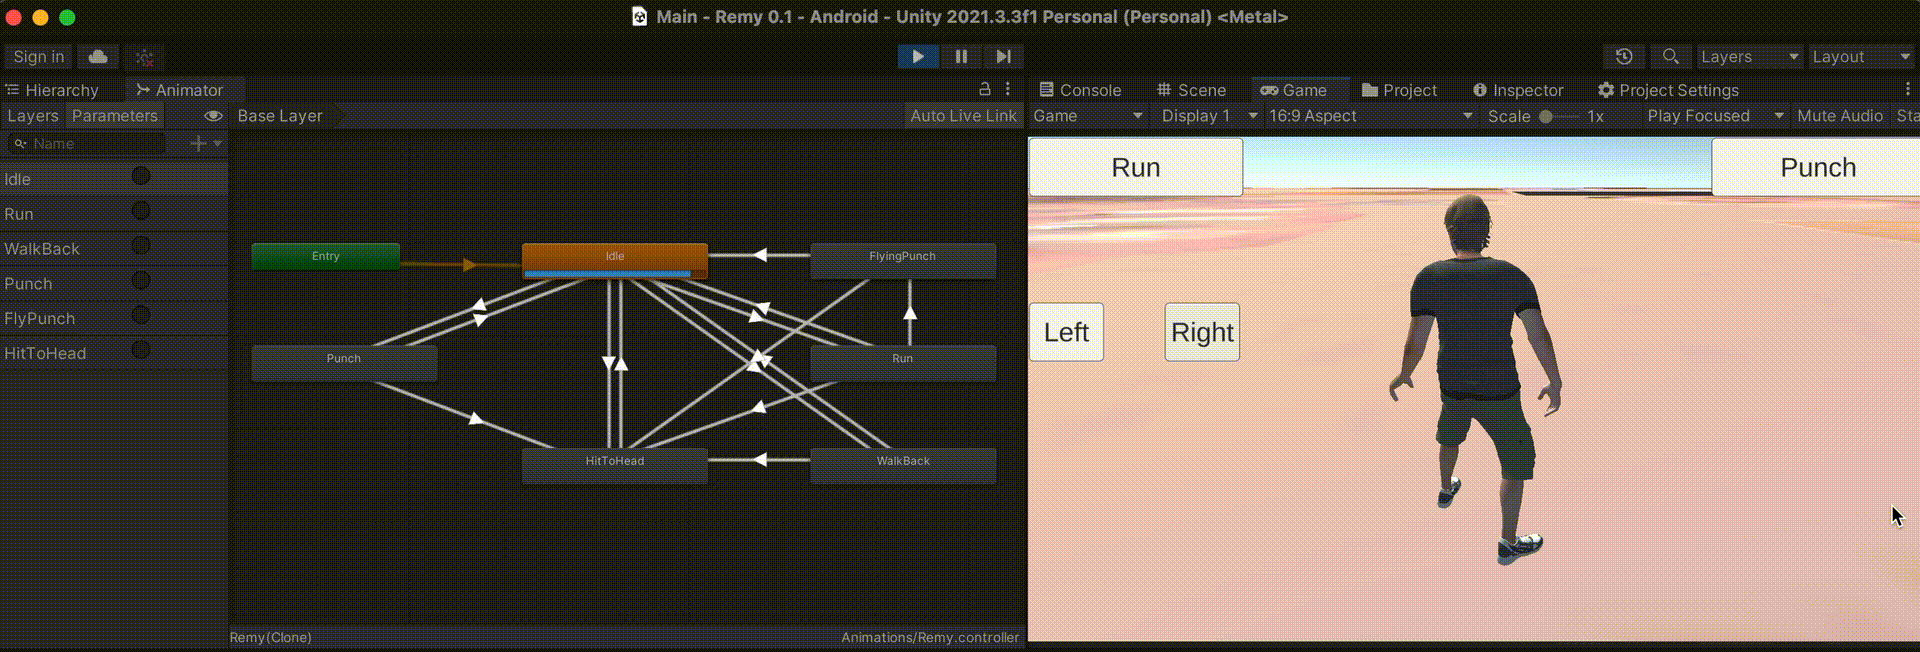
Then I defined the animations flow inside a new Animator. It looks great!
Building the App
In this section, I will give you some hints about how I built the Unity app. Don’t worry about the code and the project hierarchy! The entire Unity project is available for download at the end of this article.
Character movements
Our character can run, walk back, and rotate. We use the function OnAnimatorMove to have total control over it.
Sending data to the game server
When one starts to build the client, the following question comes to mind:
When should I send data to the game server?
The game server needs to be aware of all actions a player performs to inform the other players, but sending too much information would saturate the game server and burn resources. Remember: don’t send data every frame; otherwise, your game server will die!
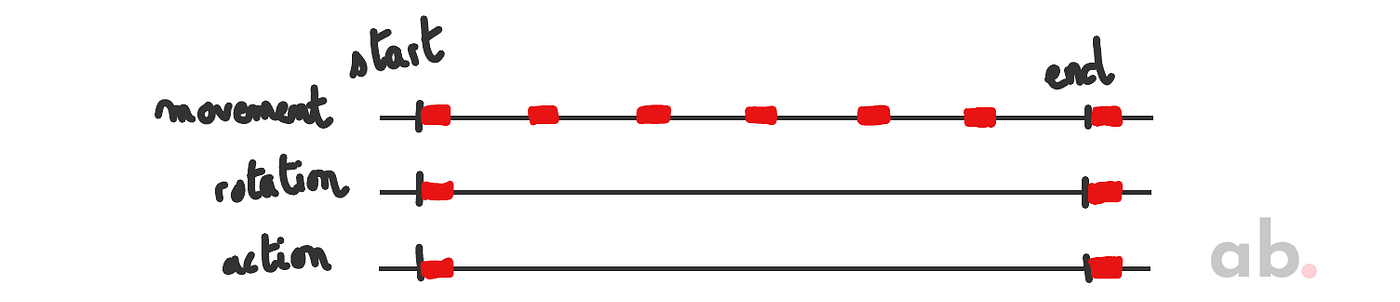
I found that data can be sent in those cases: when the player starts and ends any movement (running and walking back), any rotation (turning left and right), and any action (punching, etc.).
If you have played online, you may have experienced the famous “lag,” meaning that what you see is delayed over reality. That can be caused by a slow internet connection or a high-latency game server, but it can also mean the server data must be updated. That is why this is important to “fix” the data occasionally, sending the server updated data. I decided to do it every second in the movement functions.
Player data
For the basic game I made, I used the following data:
Note that the PlayerCoord class has four components: I used this for position or rotation (quaternions).
Costs
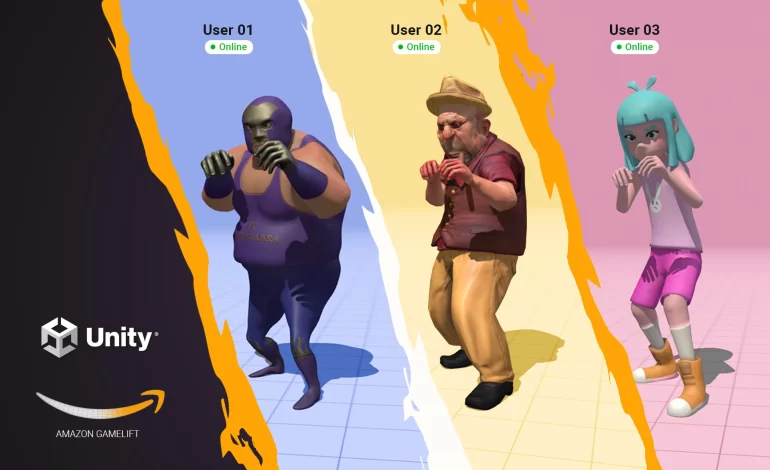
Let’s consider the following case: you published a successful FPS game with the following characteristics:
- Every game session has a limit of 30 players.
- In the peak hour, your game receives approximately 40 concurrent connections from players located in the United States.
- Your GameLift fleet uses
c4.largeLinux Spot instances, and each instance handles a single game server.
Based on the Steam statistics, we can speculate that roughly 35% of the day, a single game server is used versus two games servers in the peak hour:
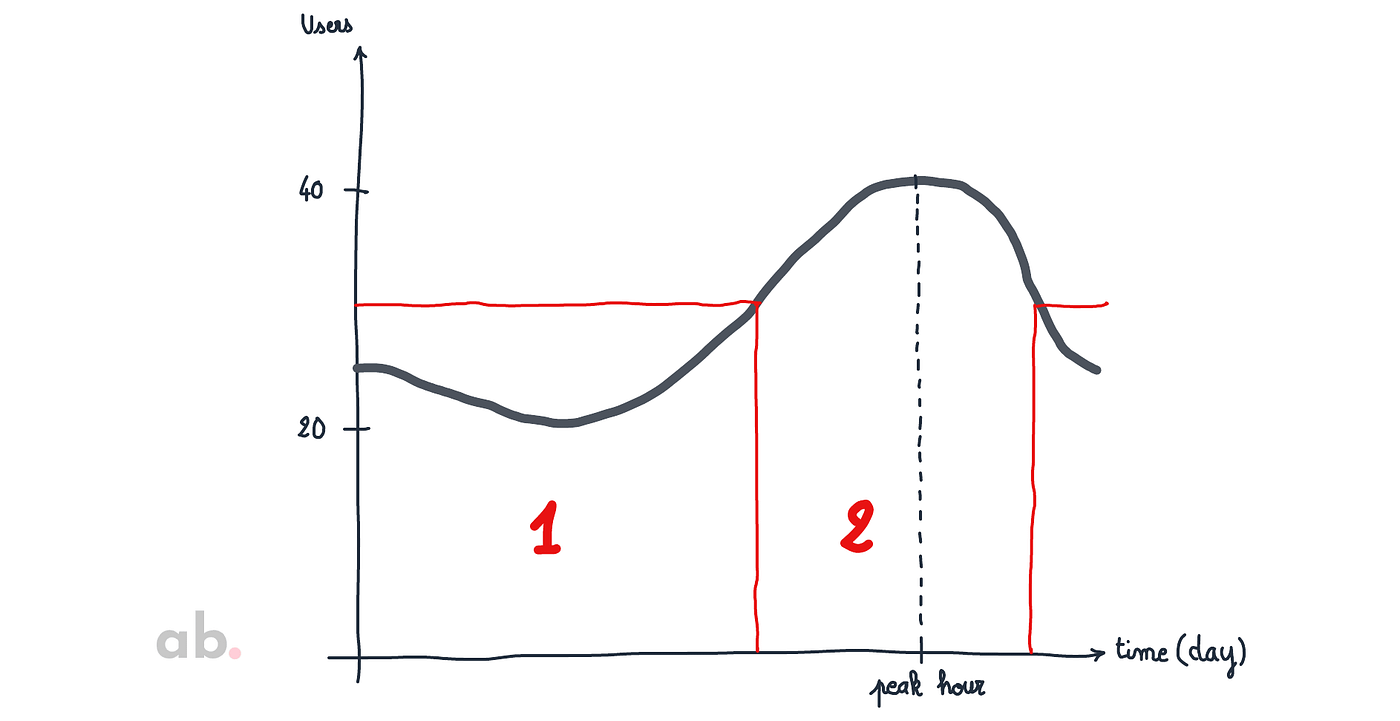
The pricing sheet of Amazon GameLift indicates that a c4.large Linux Spot instance costs $0.07848 per hour, $56.51 per month. We can deduce the following calculation:
Total cost per month = $56.51 x 1.35 ≈ $76.28
GameLift is expensive, but hey, it is worth it! You save time and money instead of implementing your solution and possibly needing help with scaling issues. If you are using GameLift for your game, you should find a way to monetize it (ads, in-app purchases, etc.).
Here are the other costs:
- Unity: As always, Unity is free. The personal plan is a good fit unless you need specific advanced features for your game.
- Cognito: There is no charge for Cognito Identity Pools. Awesome!
- Lambda: The Lambda function is called only once when a new player joins the game. Estimating an exact number of monthly connections is complex, but let’s say 100,000. With 128 MB allocated memory, and each request duration of 500 ms, the cost would be $0.12.
Total: Our real-time multiplayer game bill would be approximately $77 per month.
Final Thoughts
Building a real-time multiplayer game is relatively easy! Amazon GameLift provides all the infrastructure required for this type of application and allows game developers to focus on the visual part.
You are free to use all the resources I provided in this article. Please ping me if you use them to build your game; I would be delighted to see the result!
Resources
Here are all the resources mentioned in the article:
- The Lambda function in Python
- The Lambda policy attached to the Lambda role
- The Cognito policy attached to the Cognito role
- The GameLift Script in JavaScript
- The Unity package of the game
I also used free Mixamo characters and PolyHeaven-free textures.
How SQL Skills Can Boost Your Resume