This article was initially published on my Medium Page.
Weeks ago, a nice guy reached out to me on LinkedIn. He told me the following:
Hey, Alexandre, how are you? I’m trying to register users in an AWS Cognito User Pool from a Unity3D app, but I’m struggling to find literature for this. Could you help me to build a simple signup flow?
Oh, this is interesting! I usually receive questions on my social networks, but this one deserves a detailed answer. Let’s see.
If you prefer watching a video instead of reading, please check the following video:
The Cognito Signup Flow
The Cognito documentation tells us the following:
- A user first signs up to Cognito. State: Unconfirmed
- Then, the signup needs to be confirmed. There are three ways to do it: the user can do it by email or phone, it can be done with an admin function, or it can be done automatically with a Lambda trigger. State: Confirmed.
- The user can log in.
User Confirm, Admin Confirm, and Automatic confirm:
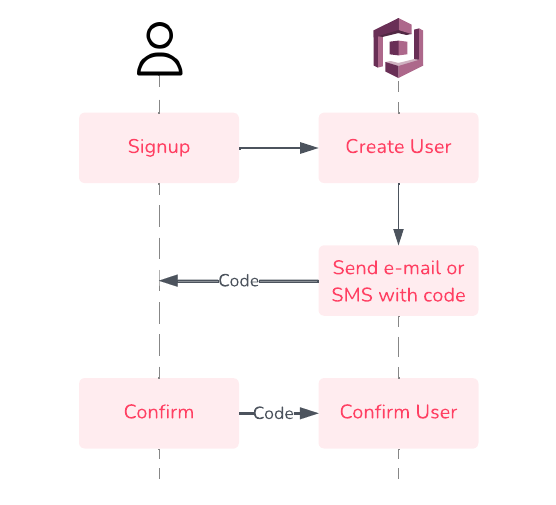
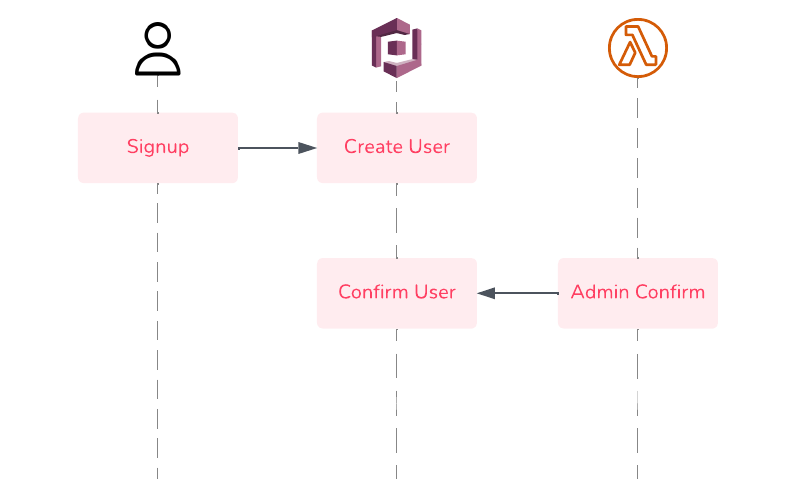
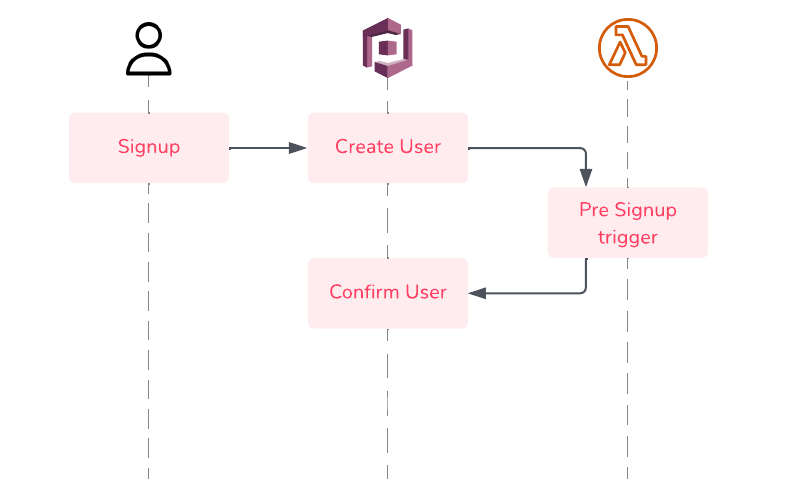
This article will detail the signup process and the three ways to confirm it.
Cognito
When you create your User Pool, ensure you have chosen a confirmation method. I can be by email or by SMS. In this article, we will perform an email validation.

Also, activate the self-service sign-up so that the users can signup themselves.

The Signup
Here’s what the signup function in Unity looks like:
Notes:
- We send the three mandatory attributes specified in the Cognito documentation: the
username, thepassword, and the User Poolapplication ID. - We send the user’s
emailas a user attribute so that Cognito can send the user an email with a confirmation code. - The Post function of UnityWebRequest does not support JSON strings and uses a strange HTML string encryption instead. A workaround is to do a weird trick with a byte array and a Put request. Please let me know if you have a better solution in the comments section.
- We specify the value
AWSCognitoIdentityProviderService.SignUpas a header.
After executing the code above, Cognito returns in Unity the following answer indicating that the user is not confirmed yet and that an email has been sent:
Let’s check it; a new user appeared in the User Pool with an unconfirmed status:

And we received a no-reply email with the confirmation code:

The Signup Confirmation: The User Way
This is the signup confirmation function in Unity:
Notes:
- We send the three mandatory attributes specified in the Cognito documentation: the
username, the confirmationcodewe received by email, and the User Poolapplication ID. - We specify the value
AWSCognitoIdentityProviderService.ConfirmSignUpas a header.
After executing the code above, we can observe that the signup has been confirmed:

The user can now log in.
The Signup Confirmation: The Admin Way
Once the user has been created, we can confirm it with a Lambda function in this way:
Notes:
- We use the function
admin_confirm_sign_upof boto3 to confirm the user
The Signup Confirmation: The Automatic Way
Another way to confirm the user’s signup is by using a Cognito trigger and a Lambda function.
First of all, we create our Lambda function:
We indicate to Cognito that the user is confirmed, as specified in the Cognito documentation.
Then, we create a pre-sign-up Lambda trigger in Cognito, and we attach our Lambda function:

Go back to Unity. We execute the signup function, and Cognito returns a message indicating that the signup has been automatically confirmed. No email has been sent, and we don’t need the Unity confirmation function.
Costs
Unless you have more than 50,000 MAUs (monthly active users) in your User Pool, Cognito is totally free! Unity3D is also free unless you want to unlock some specific options.
Note that there is a limitation for email sending with Cognito. If you need to send more than 50 emails daily, you should use SES. Suppose that your game is a huge success and has 30k new users in a month; your signup system would cost 3.00 USD monthly.
Closing Thoughts
This article shows three ways of building a whole signup flow using Unity3D and AWS Cognito: with user email confirmation, with admin confirmation, and with automatic confirmation.
I truly hope you liked this article. If you have any questions, don’t hesitate to get in touch with me on my social media. I will be glad to answer you!
Thanks for reading!
