This article was initially published on my Medium Page.
I recently moved into a new building with security guards and a video security system. Nothing strange in Peru; buildings with such a level of security are pretty common since home burglary is exceptionally high in the country. According to the security experts Budget Direct, Peru has the highest home burglary rate in the world, with 2,086 per 100,000 people per year.
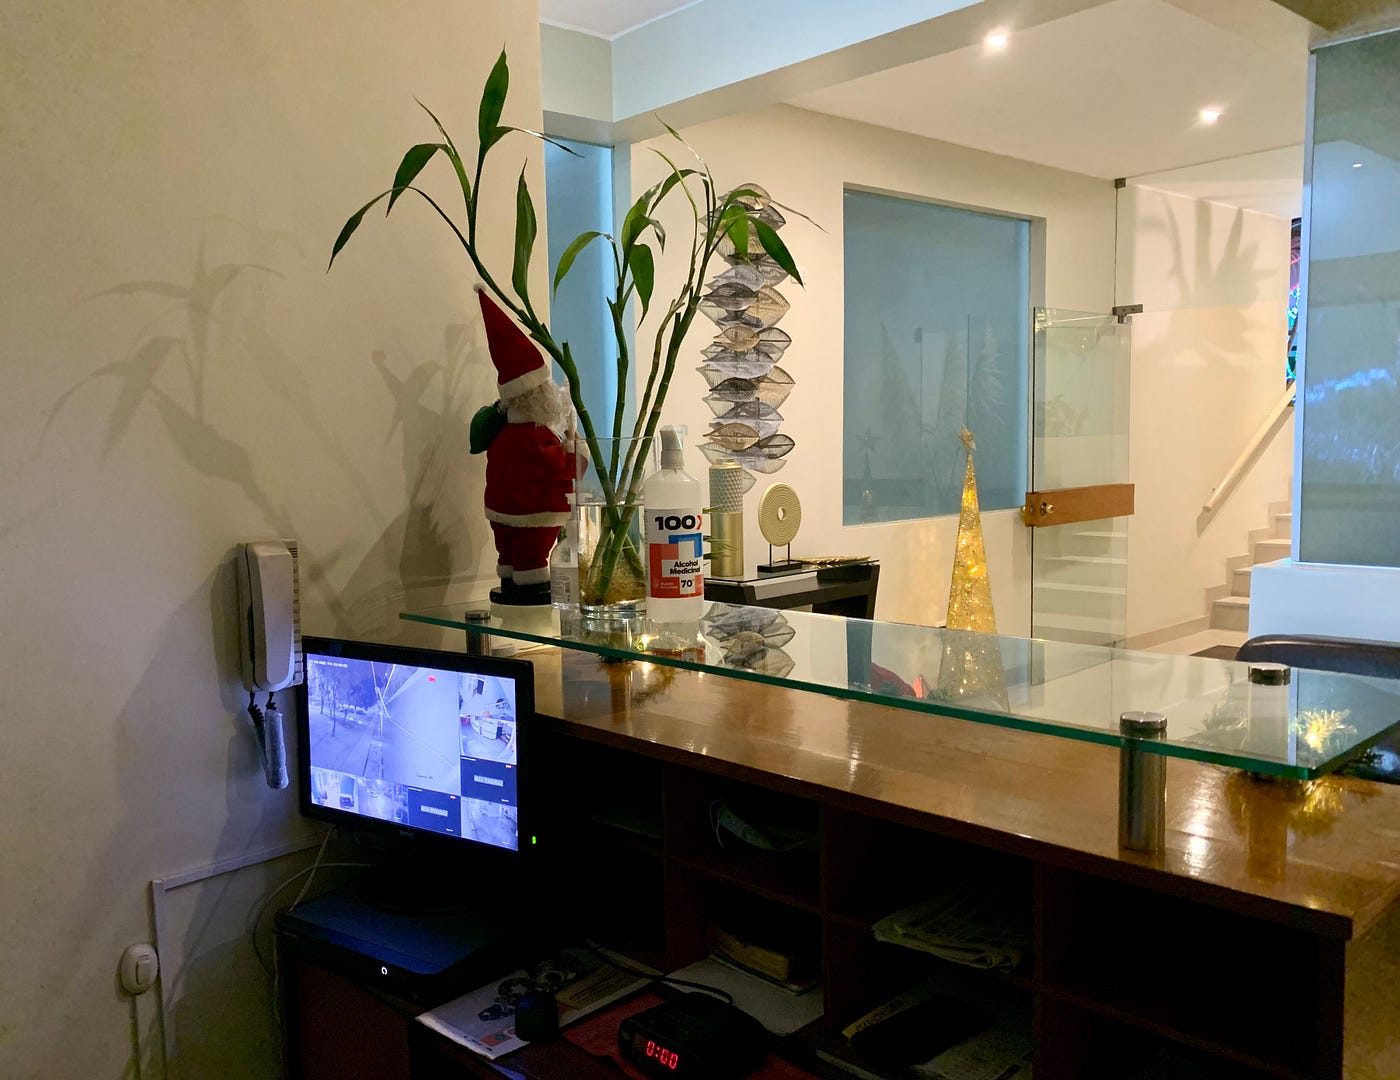
Then, an idea came to mind: could I reproduce such a system on my own but for my home? You may remember previous articles of mine where I was playing with camera devices in Unity, so I had some experience dealing with video streams, and the idea looked feasible. Plus, I did not know what to do with the webcam device I bought to get AWS certified, so it was a great opportunity to reuse it.
Furthermore, I thought that it would be awesome to integrate a surveillance component that warns me on my phone when some movement is detected by the cameras. Companies like Xiaomi provide this kind of solution, and I could take it as an inspiration.
Requirements
This may be the hardest part. The idea floating in the air should be converted into something concrete, and a list of reasonable requirements should be defined. The common error is defining too many requirements that lead to an unfeasible project.
Based on my idea, I could define the following requirements:
- I should be able to visualize all the live video streams on my PC monitor.
- The system should work with the old-school webcam device I had to buy to get AWS certified.
- The system should be able to handle a variable number of camera devices.
- Since I can not always watch the monitor, the crucial moments (movements) should be recorded and stored in an online repository.
- After a video is recorded and stored, I should receive a notification on my phone.
- I should be able to download and visualize the videos on my mobile phone.
- Each video recorded should show the name of the camera device and the exact date and time.
Software Architecture
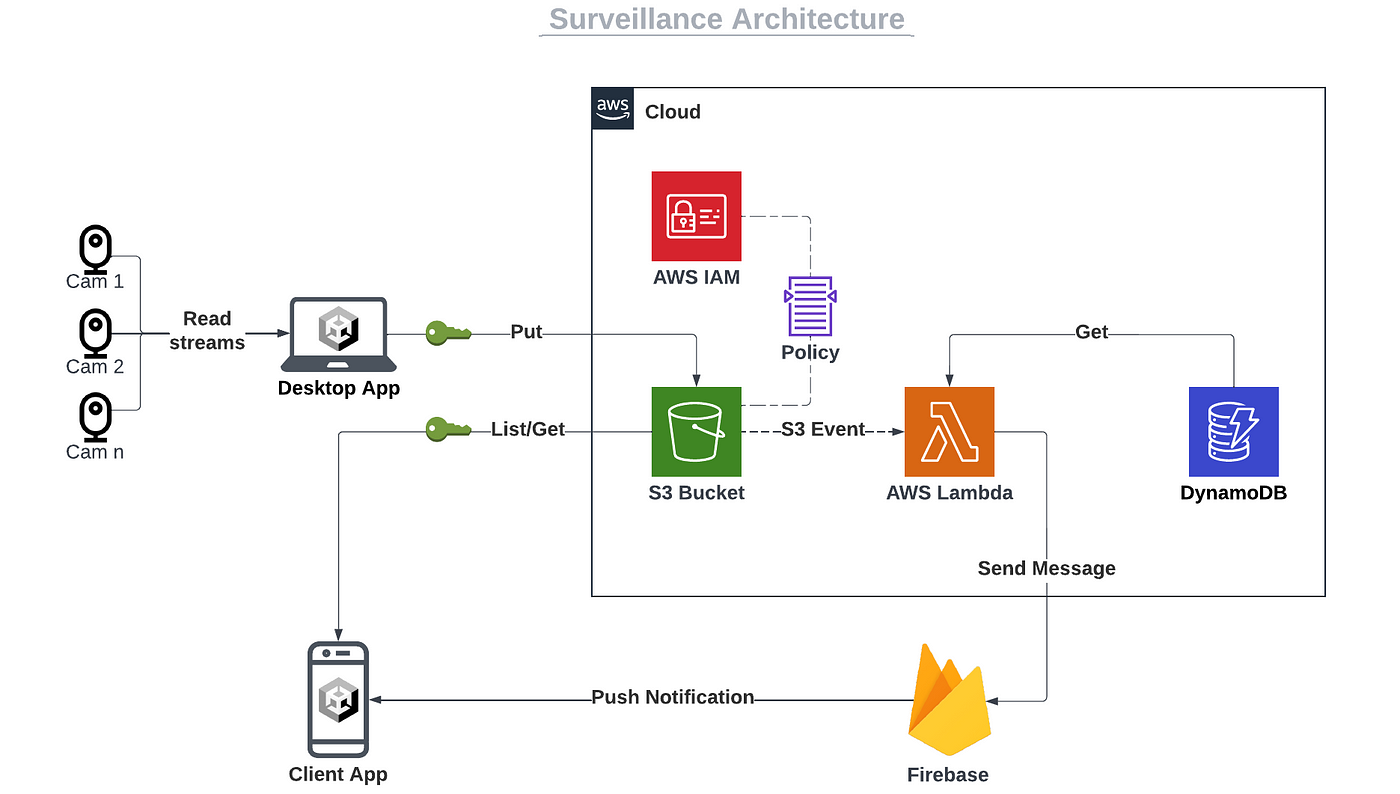
Let’s begin with the software architecture. Based on the requirements, we can define four main components of the system: the Desktop application, the client application, the backend system, and the messaging service.
For the desktop application, I chose to work with Unity3D. It may not be an obvious choice to make such a system, but I have experience with it, and it has been a long time since I wanted to make a direct integration between Unity3D and AWS, so this is a great opportunity!
Unity3D is a more obvious choice for the client application since it can run on multiple platforms and OS (Unity apps can run on Desktop, iOS, Android, WebGL, tvOS, PS4, and PS5).
For the server side, I chose to work with Amazon Web Services (AWS) mainly because of the reliability of its scalable services and my experience with it.
For the notifications, I chose Firebase, which provides the most popular Cloud Messaging platform at a meager price.
Here is the general architecture of the solution:
Notes:
- The desktop application will handle the video streams of the camera devices and show them on screen.
- Both Unity3D applications will connect directly to AWS using the AWS SDK for .NET.
- For this article, I decided to keep it simple: I will use IAM users to connect the applications with AWS securely. If you want to see a great integration with API Gateway and Cognito users, please read the following article: How I Built a Hotel Platform with Unity3D and AWS.
- IAM policies will restrict access to a specific S3 bucket.
- Once a video is uploaded to the bucket, an S3 event is triggered, and a Lambda function is called.
- The Firebase token of the mobile device is kept in a DynamoDB table. Again, I kept it simple: I will manually copy the Firebase token into the DynamoDB table, but we could also write a Lambda function to automatize it.
- The Lambda function calls the Firebase Cloud Messaging service to send a push notification to the registered mobile device.
Unity3D implementation
Showing video streams
Do you remember my article about real-time texture analysis? We will build something similar for the Desktop application. We need the following Unity objects: a Camera, a Plane, and a WebCamTexture.
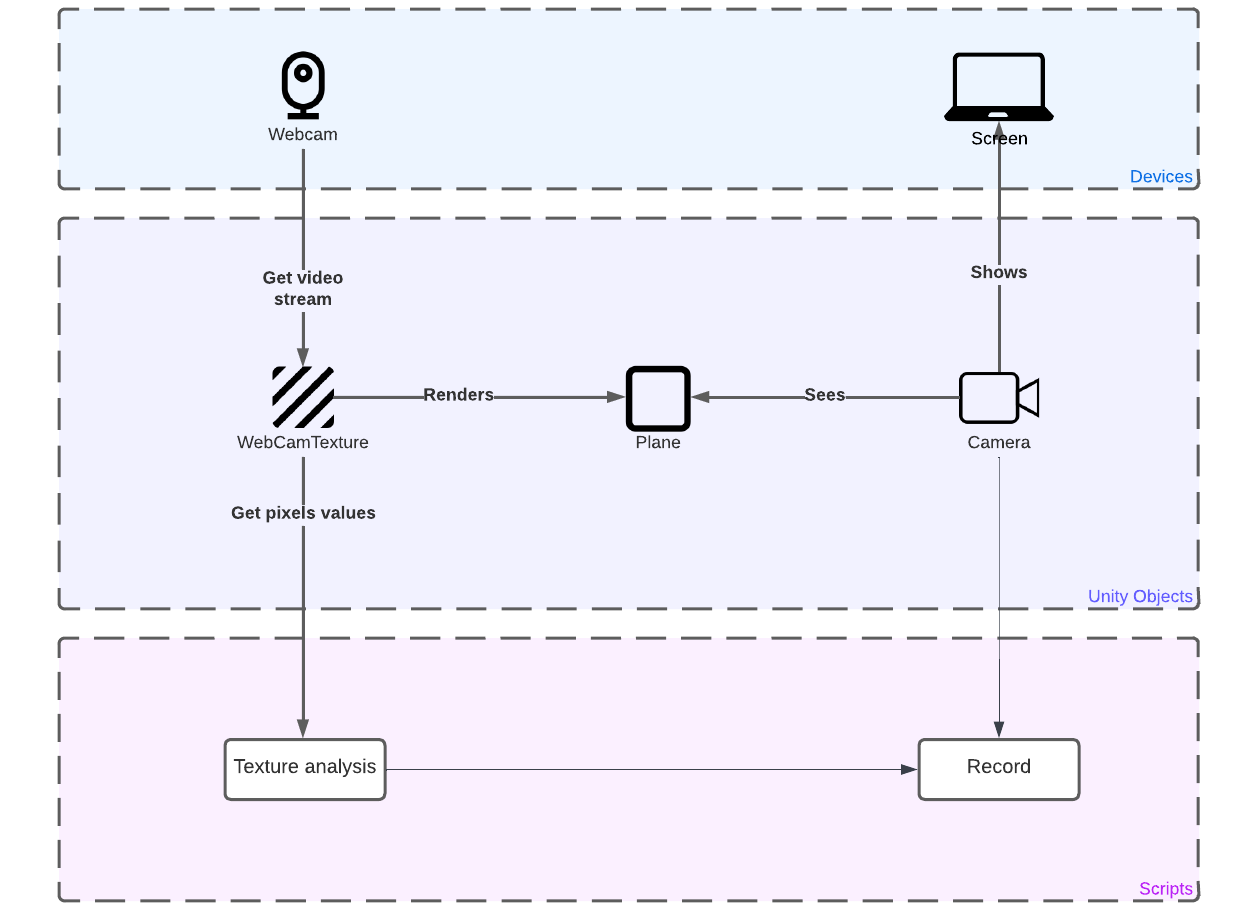
For each camera device, we will get the stream as a WebCamTexture and render it on a Plane. A Unity Camera will focus on the Plane, and a video will be recorded if a movement is detected.
We will create an object containing the Plane, the Text (camera name and date), and the recording Camera. A script CamController is attached to the parent object and will manage all related to the video stream: opening stream, texture analysis, and recording. For each camera device, we will clone (or instantiate) the model object.
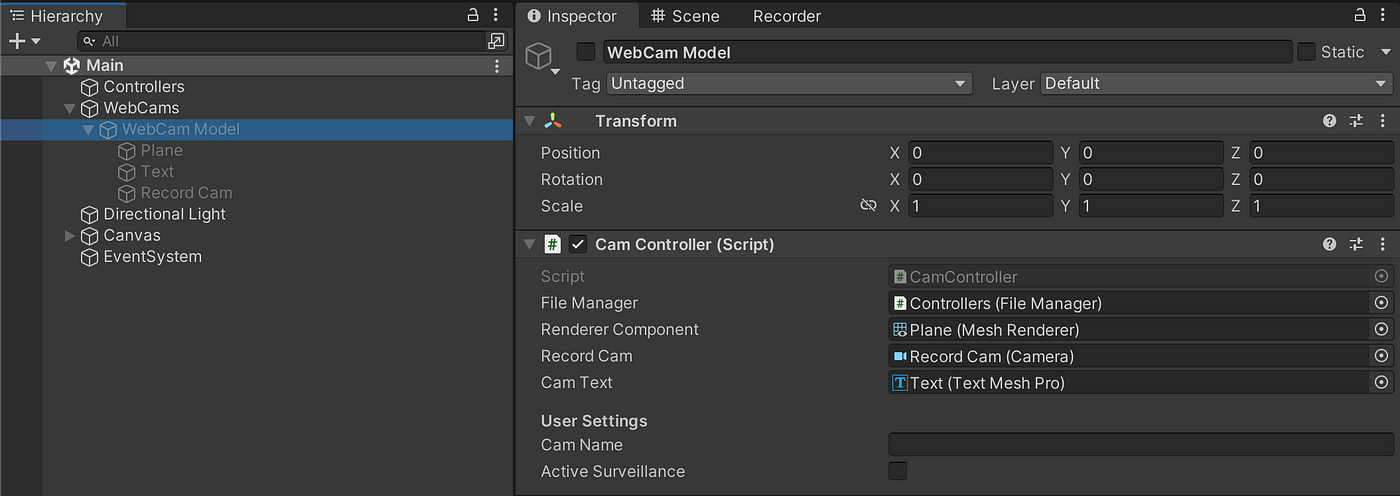
So first, we look for the available webcam devices, and we will create an object for each one:
Notes:
- We use the class WebCamTexture to retrieve all the available video devices.
- We use the Instantiate function to clone the model object.
Then, we will init the cam controller:
Then, we update the text field each second with the current date and time:
Notes:
- We use the InvokeRepeating function to call the update function each second.
- We use the
<mark>tag of TextMeshPro, which offers seriously fantastic format options, as mentioned in the documentation. - We use the .NET DateTime.Now function to retrieve the actual date and time, and the ToString function to format it.
Finally, we can show the video streams:
Notes:
- We create a new
WebCamTexturewith the exact name of the device and a standard HD resolution. - We render the stream on the
Planereplacing the plane’s texture with the WebCamTexture of the camera device. - We use the Play function of
WebCamTextureto show the video stream.
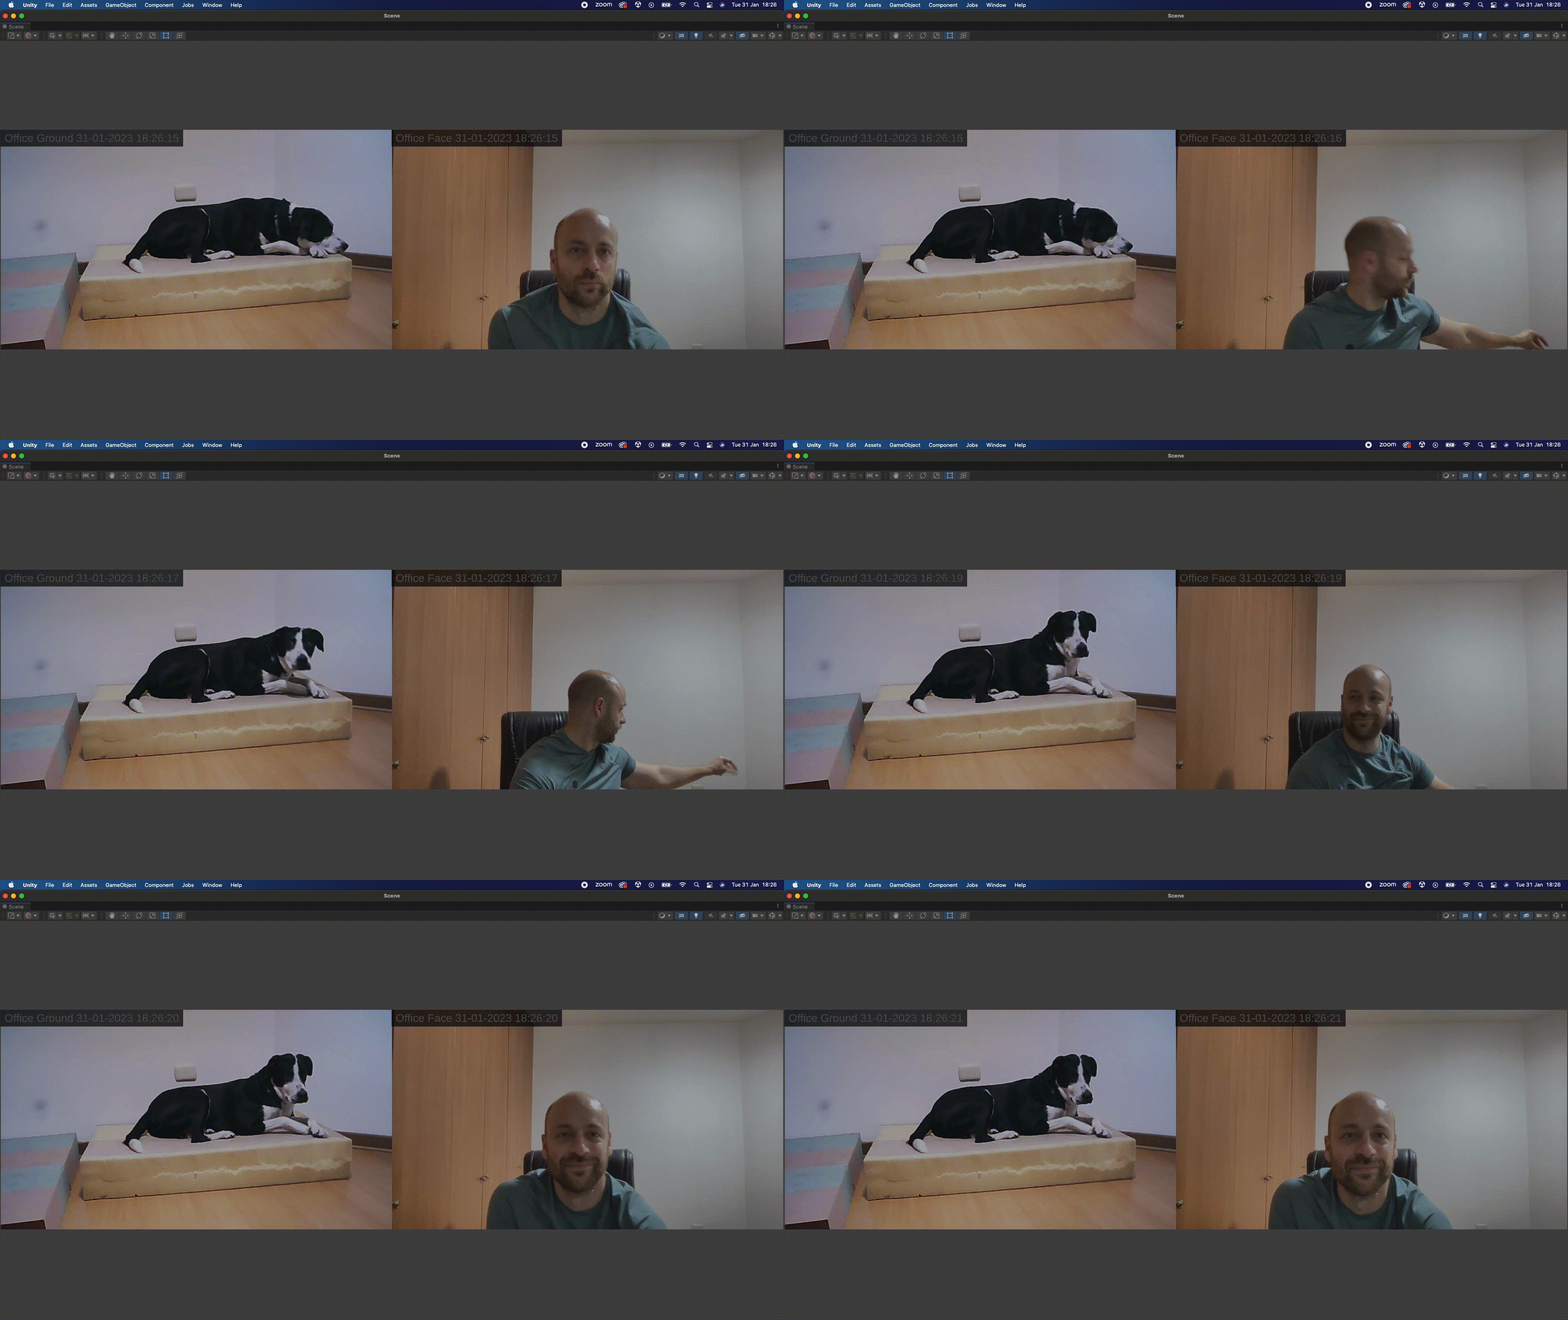
Here is the final result with two camera devices and my dog Oreo; it looks pretty cool 🐶 ❤️
Movement detection
We will now perform texture analysis in real-time to detect any movement on camera. This should include the following behaviors:
- Objects moving relatively fast: people, animals, or something else 👽 walking
- Brusque change of light: light turned on in the room, flashlights, etc.
- Any strong environmental perturbation: earthquake, fire, explosion, lightning, etc.
In the following example, I took two identical pictures consecutively, and I checked the differences with the online tool DiffChecker. Differences are highlighted in pink on the third picture:
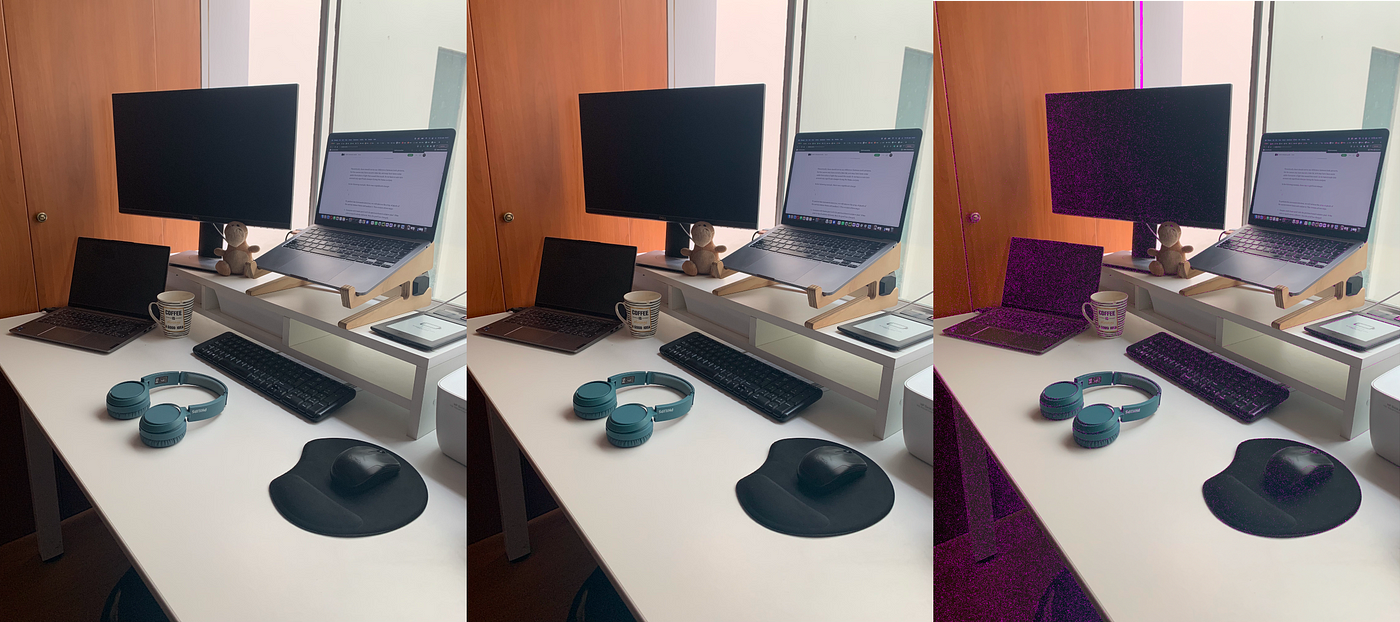
Theoretically, there should not be any difference between both pictures, but there are: the camera may have moved a little bit, or it may have been some subtle fluctuations of light that caused this result. So we have to take into account only significant changes and ignore the weak ones during the frame analysis.
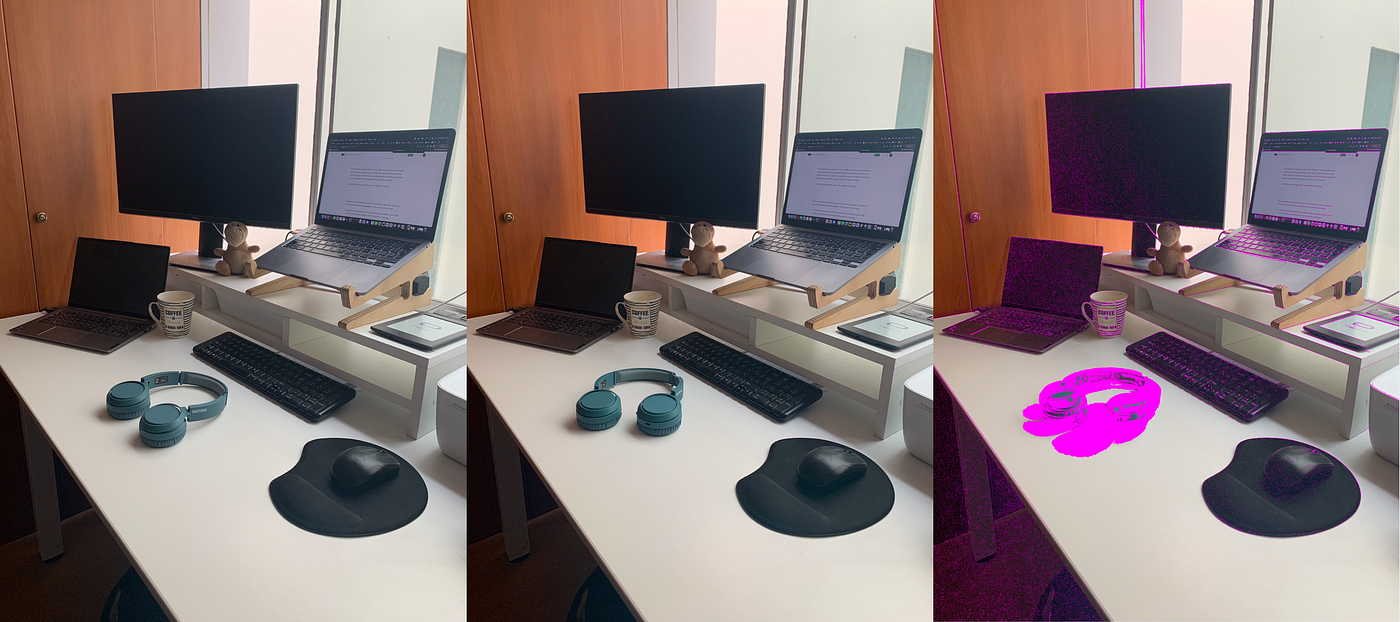
In the following example, there was a significant change between the two pictures, and we can conclude that the earphones moved. Everything else can be ignored.
To perform the movement detection, we will retrieve the array of pixels of the current texture frame and analyze it. This consists of two steps:
- Compare each frame pixel with the previous frame’s relative pixel. If the color is significatively different, then the pixel has changed.
- Count how many pixels have changed over the total of the frame’s pixels. If the ratio is significant, the frame is different from the previous one, and a movement is detected.
This is a way to perform it in Unity3D:
Notes:
- We use the GetPixel function to retrieve an array of pixels of the current frame.
- Each color channel (R, G, B) is a floating value with a range from 0 to 1.
- I found that under 5% of a color change, a pixel can still be considered unchanged.
- I found that under 5% of a total change, a frame can still be considered unchanged.
Video capture
OK, so once we have realized the movement detection on the camera devices, we need to capture the stream and save it as a video file. I found several ways to do it:
- Using the VideoCapture class: it looks good, but I’m currently using a Mac. Too bad, I need another option.
- Working with a third-party asset: It’s a better option, but I’m almost always reluctant with third-party assets. Is the asset really that good? Will it be maintained in the future?
- Using the Unity package called Recorder. This looks much better than the previous options: multi-platforms are allowed, it is released by Unity itself, and best of all… it’s free!
The Recorder package can be installed through the Package Manager window:
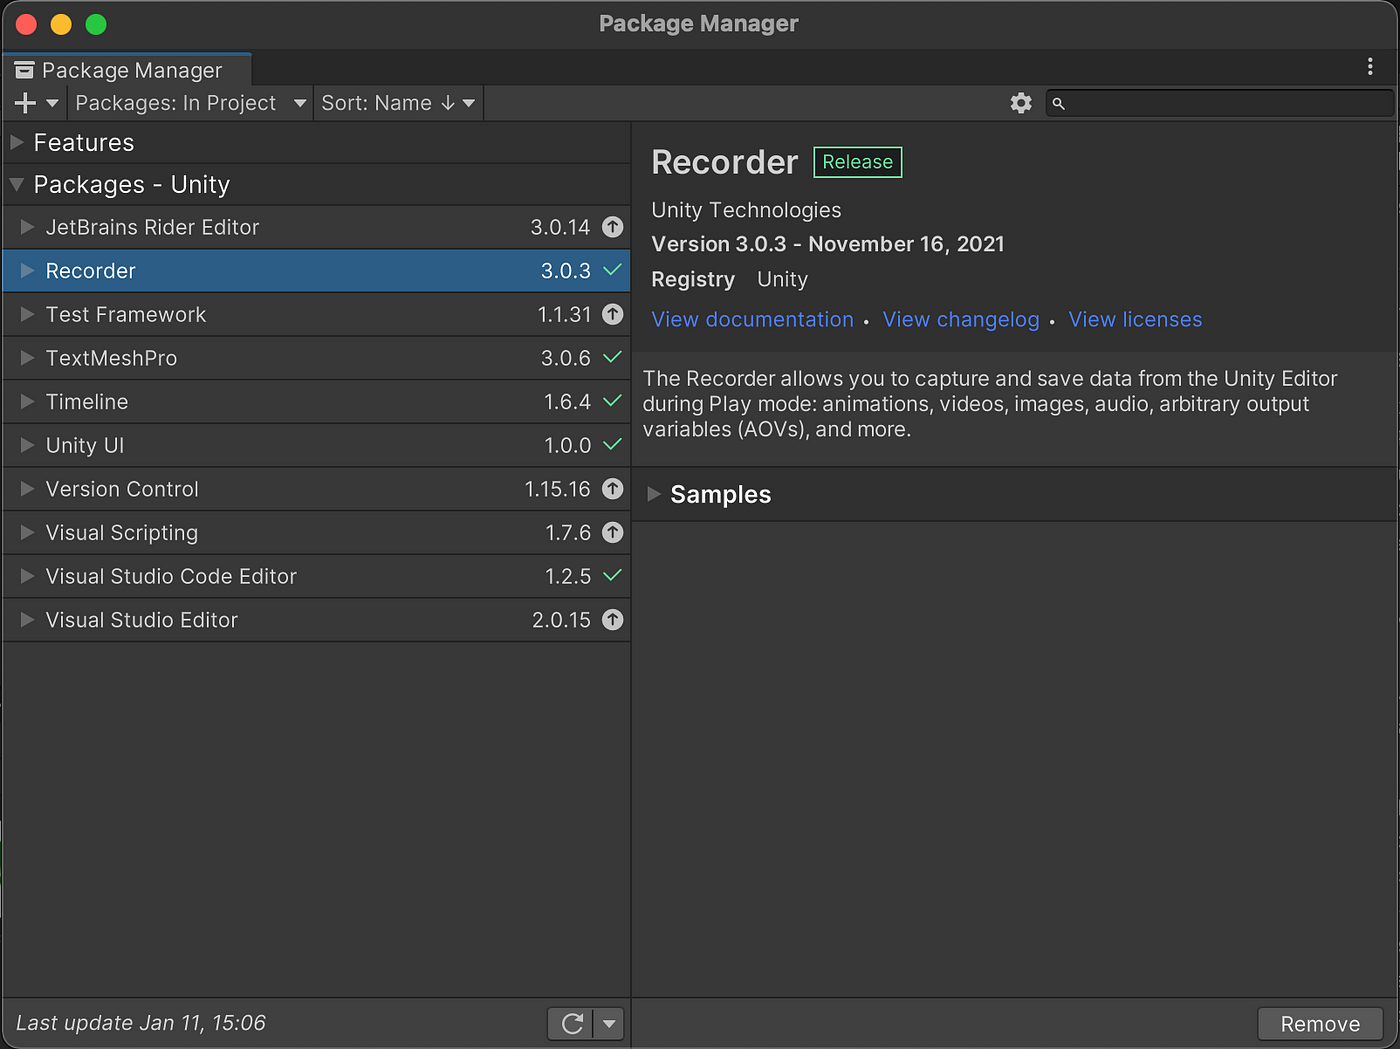
Let’s have a look at the package. The Recorder package provides a graphic interface where video captures from the editor can be performed manually. The fantastic feature of this package is that you can select a specific camera as a target. Good for us; we can record videos from different video streams simultaneously.
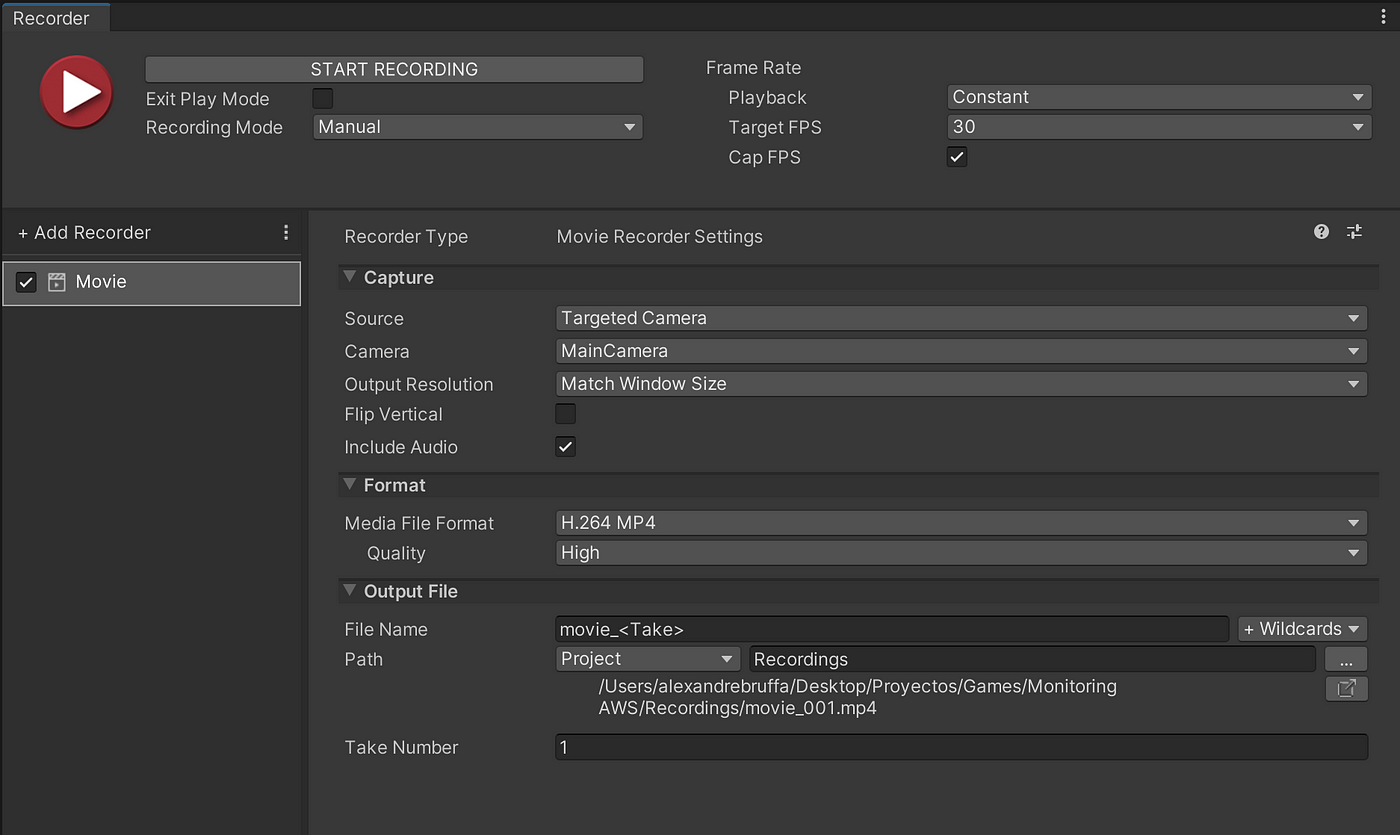
This looks good, but we need to automatize it. Here is a way to do it programmatically:
Note: all the objects and classes of the video recorder are described in the documentation.
Connecting Unity3D with AWS
➡️ Dealing with the AWS SDK:
I will be honest; I struggled a little bit on this part and will explain why.
Years ago, AWS used to provide a custom SDK for Unity3D, which was very easy to install. It has been deprecated and is now included in the AWS SDK for .NET. It sounds good, but the AWS documentation does not provide further details about using this SDK in a Unity project.
For .NET, Microsoft uses the NuGet mechanism. In Visual Studio, you can open the NuGet Packages window, where you can visualize the .NET packages installed in your current project.
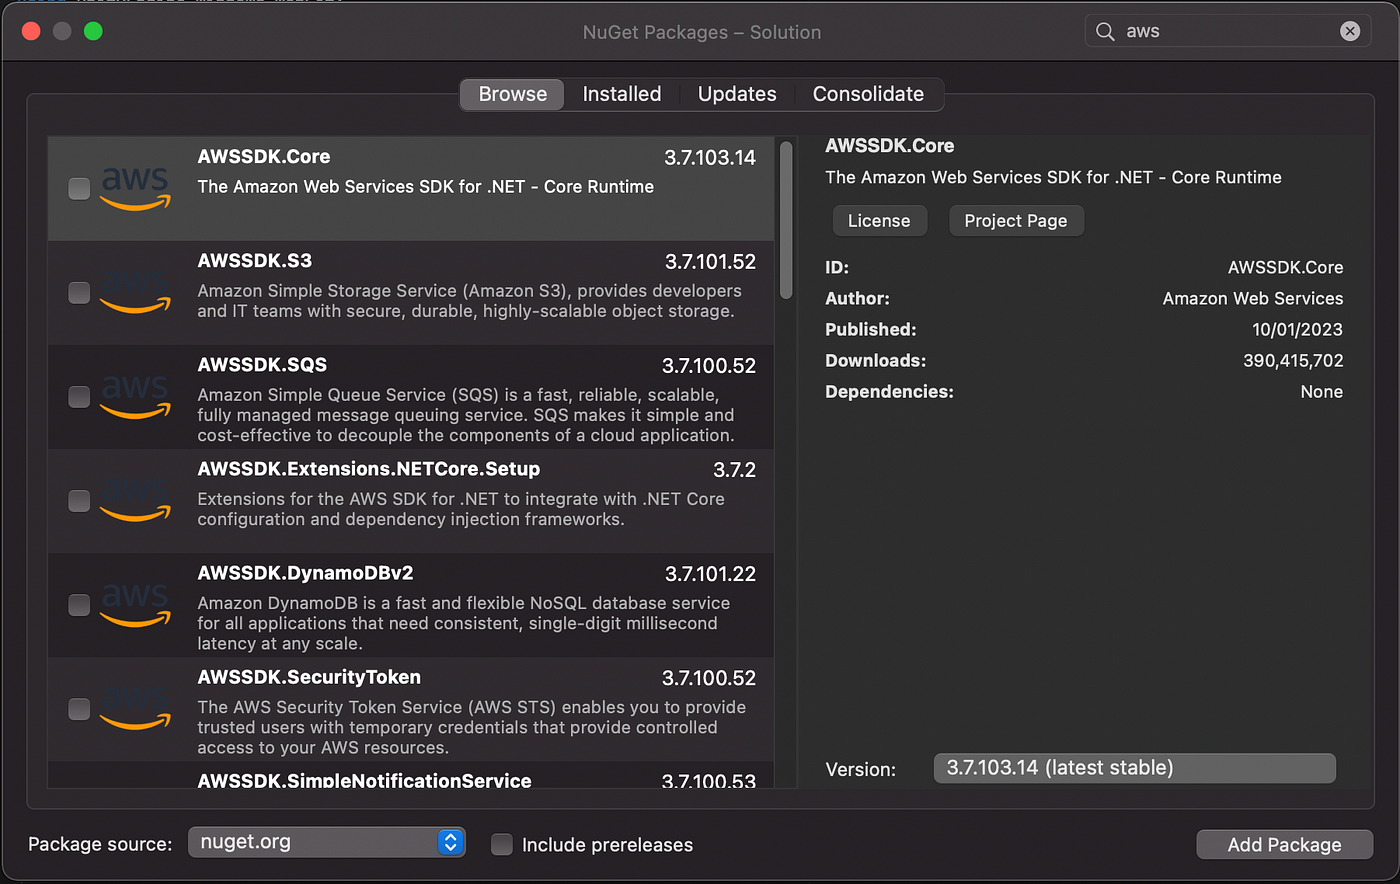
For the current project, we need to realize an integration with S3, so we need the base package AWSSDK.Core and the S3 package AWSSDK.S3.
But hold on! The NuGet window is essentially for .NET projects, so your Unity project won’t be able to recognize the packages if you install them by the NuGet window; you have to do it manually from the NuGet website.
On the NuGet website, you can download the AWS core package and the AWS S3 package. Since the AWS SDK functions use asynchronous tasks, you must also download the AsyncInterfaces package.
Once downloaded, you can unzip the packages and place them in the Plugins folder of your Unity project:
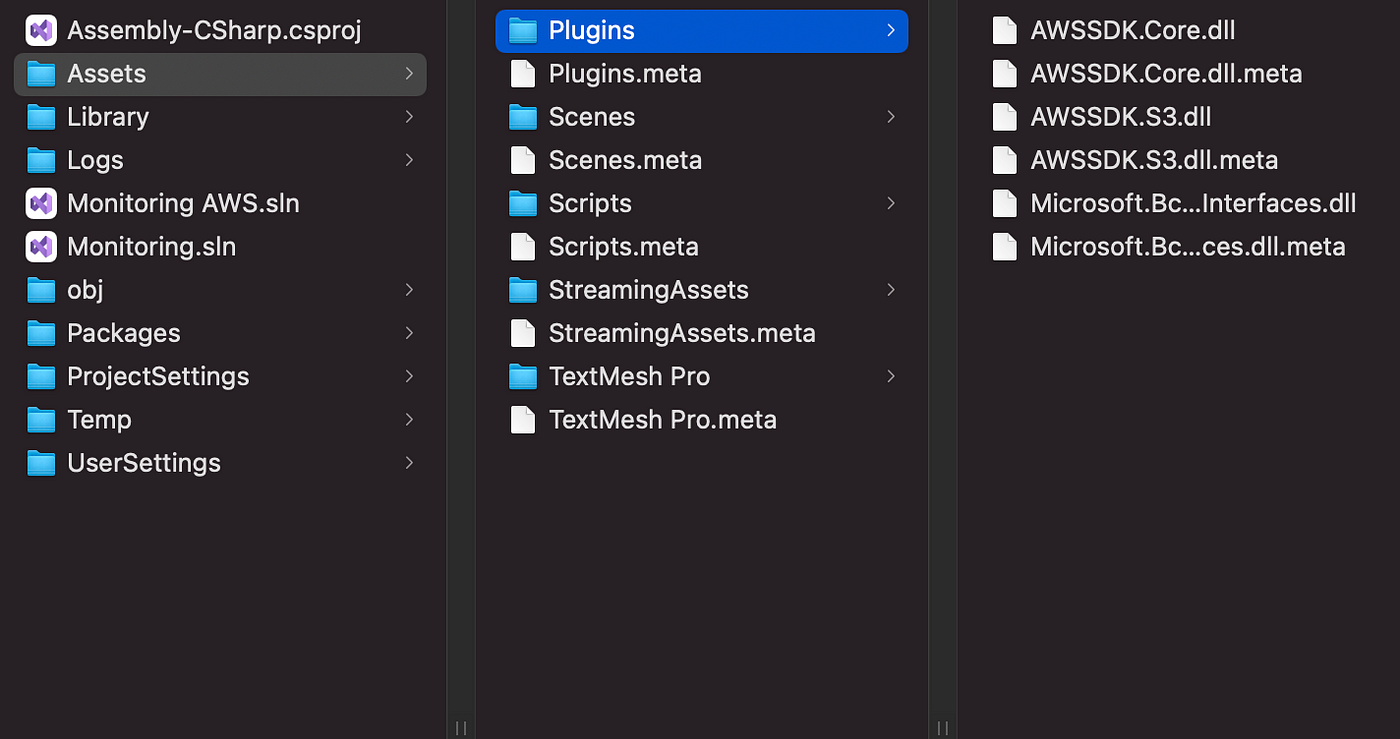
The new packages are now recognized inside the Unity project; we did it well 🙌
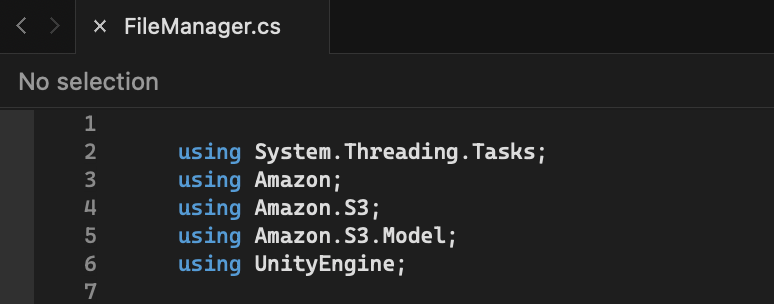
➡️ The functions:
Upload file:
In the Desktop application, we need to upload the video file recorded to our online S3 bucket. Hopefully, the .NET documentation is complete and gives us excellent implementation examples. To Upload a file, we will use the PutObjectAsync method.
Notes:
- We create an S3 client thanks to the AmazonS3Client and AmazonS3Config classes.
- We build the request thanks to the PutObjectRequest class.
- The class Task is a pure .NET mechanism to manage asynchronous processes. You can call it in Unity with the await operator within an async function.
List Buckets:
In the client application, we need to list the content of the S3 bucket. Thanks to the ListObjectsV2 method, we will retrieve a list of file names.
Notes:
- We build the request thanks to the ListObjectV2Request class.
- We store the response in a list of file names.
Download file:
Once we have the list of the files in the bucket, we can download the video of our interest. To achieve it, we will use the GetObjectAsync method.
Notes:
- We build the request thanks to the GetObjectRequest class.
- We use persistentDataPath to store in the device the file we downloaded.
Show videos
We will use the VideoPlayercomponent to show the videos inside the client application and choose “URL” as the source.
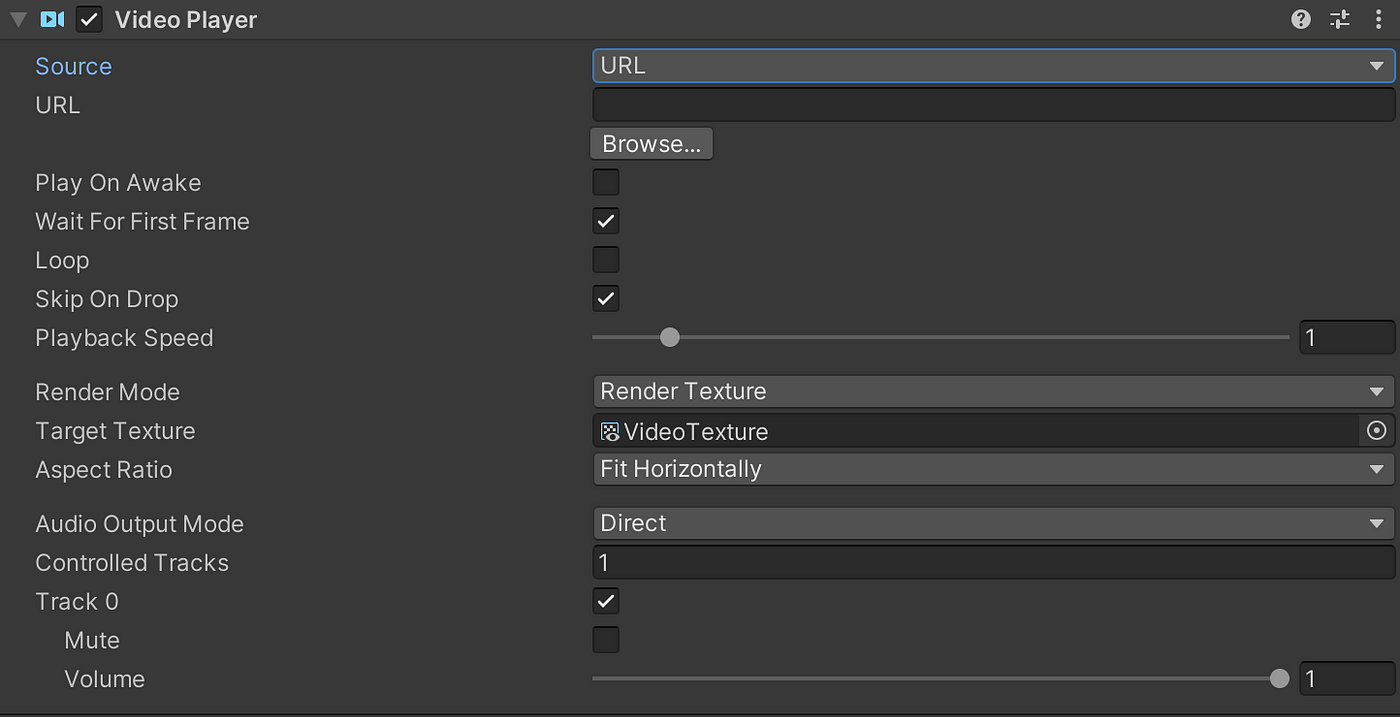
Then, for each video selected, we replace the URL parameter with the file path, and we play the video.
Notes:
- We first check if the file is already present in the device thanks to File.Exists method. If not, we download it.
Firebase
In the Firebase console, create a new project and then a new Unity app.
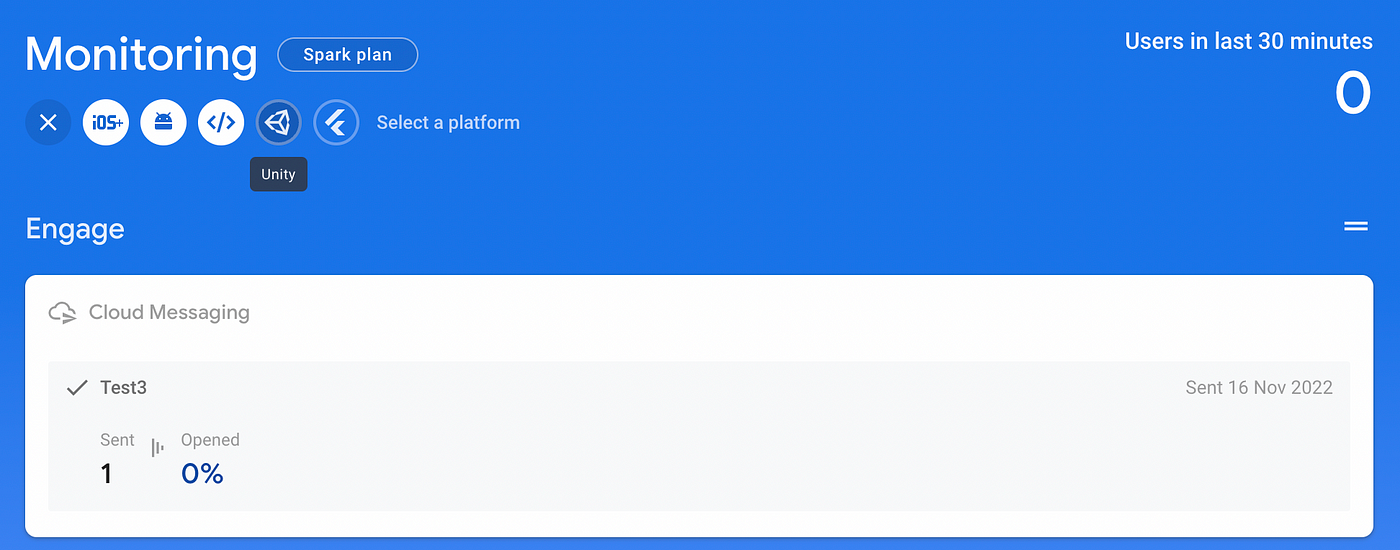
Creating a new Firebase app is straightforward: you must register the app, download the config file to your Unity project, download the Unity SDK, unzip it, and install the desired Unity packages. Every step is well-explained in the console, and the whole process only takes a couple of minutes to achieve.
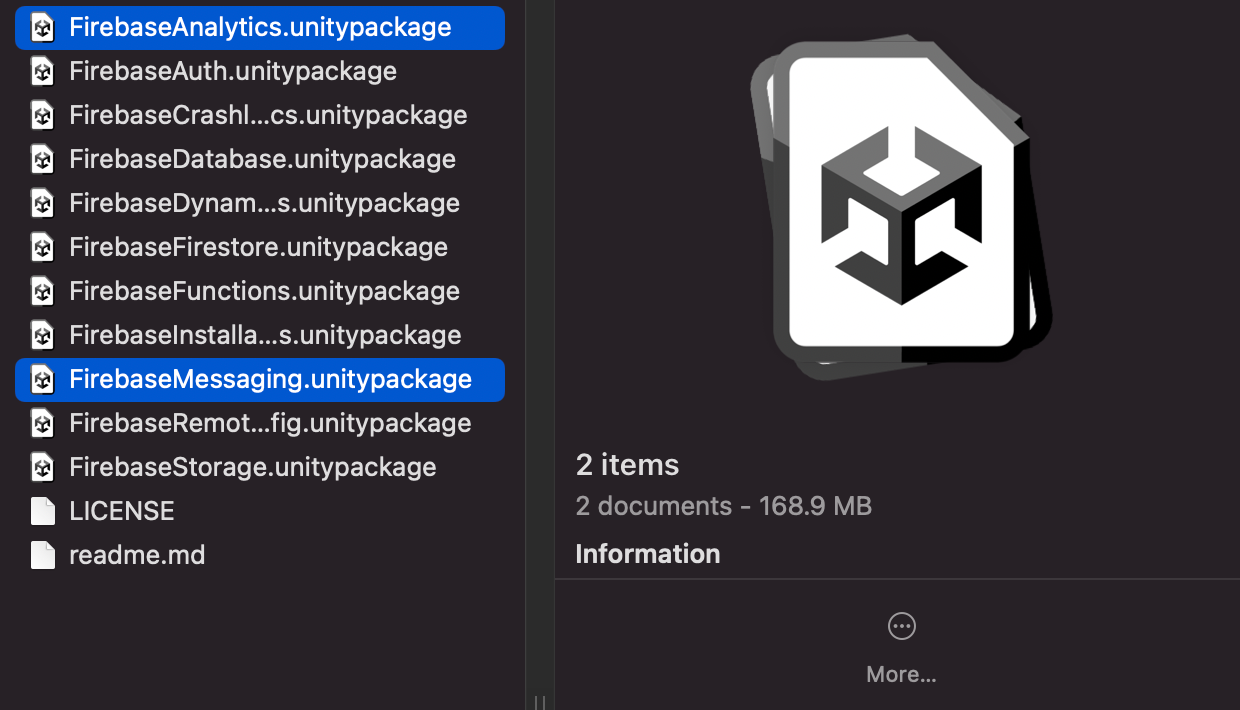
For this project, we will install the FirebaseAnalytics package (as recommended) and the FirebaseMessaging package.
In the Unity client application, we can use the GetTokenAsync function to retrieve the Firebase device token:
AWS implementation
S3
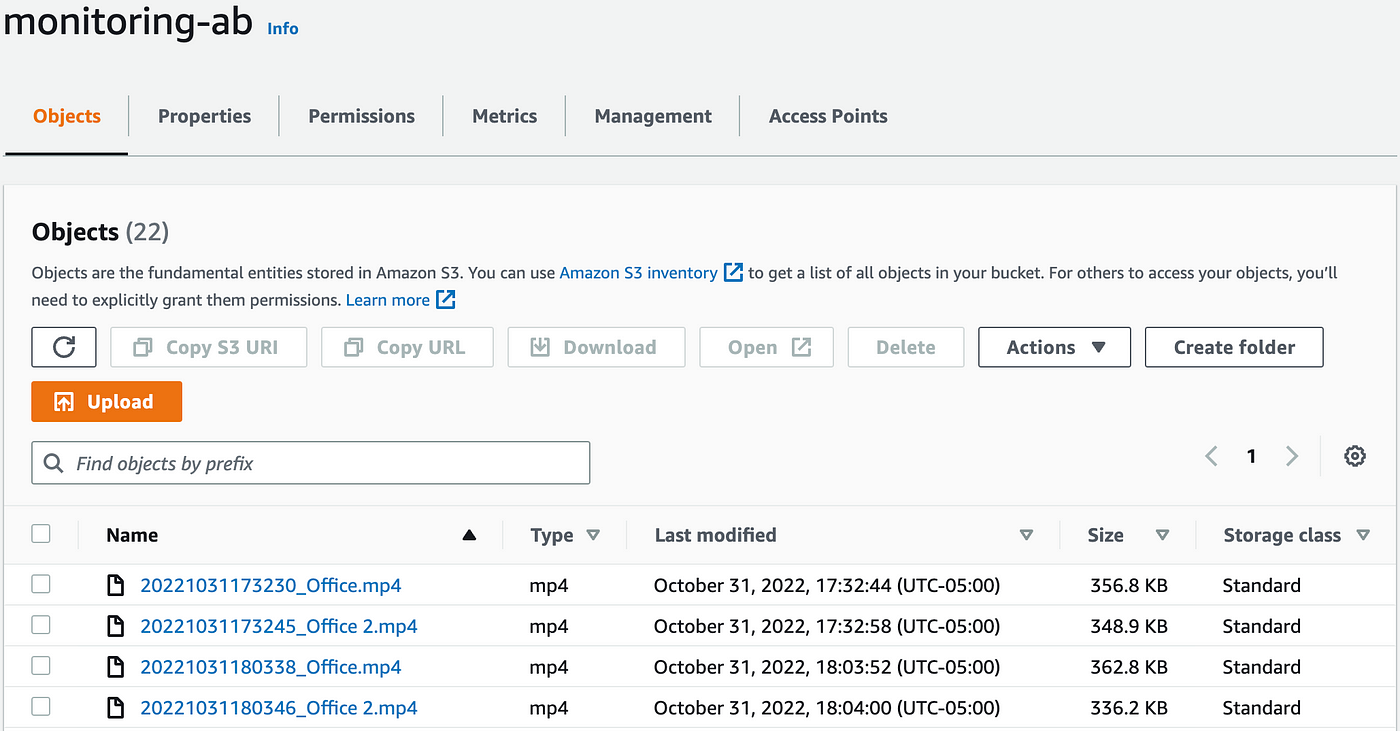
We create a private repository where all video files will be stored. I will call mine “monitoring-ab”.
IAM
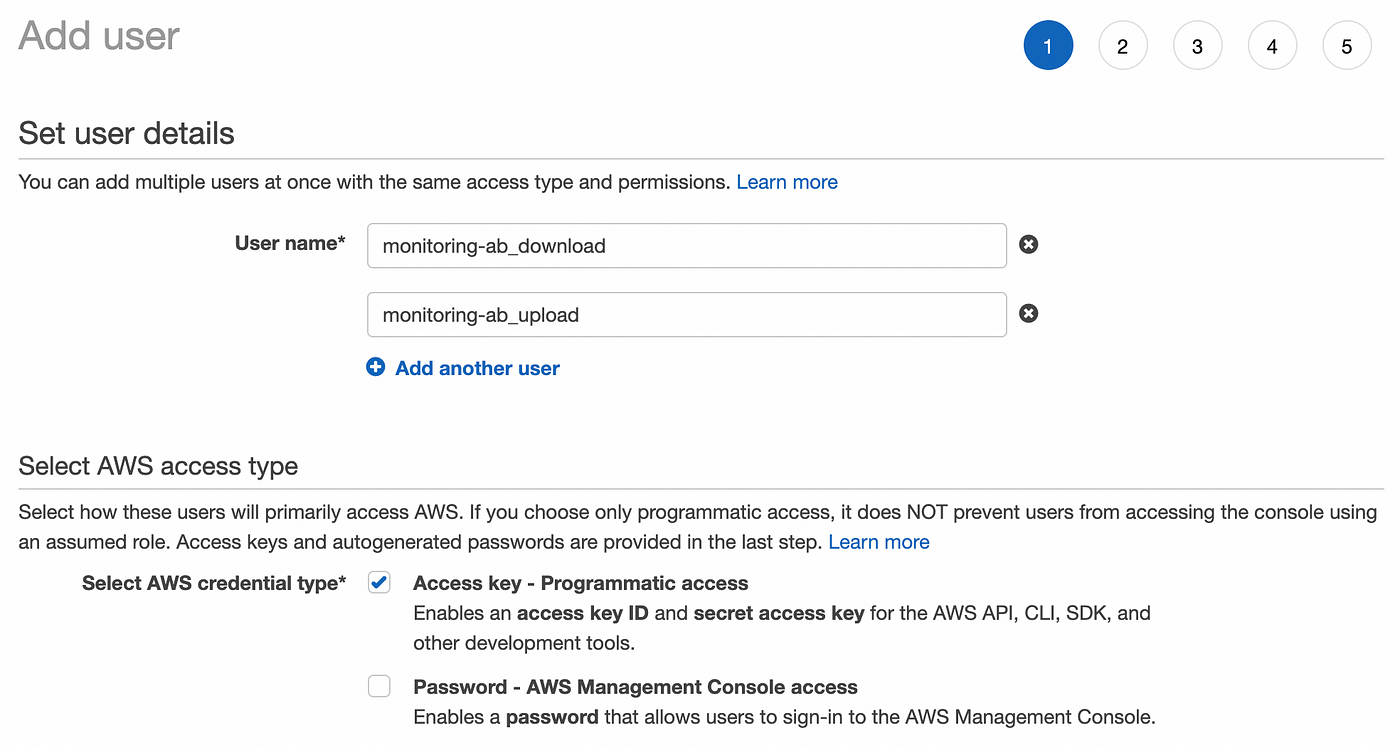
In IAM, we will create two users: one for uploading the video files to S3, and the other one to download them. In the IAM console, we will create two users with programmatic access:
Once created, don’t forget to copy the secret access key or download the CSV file with the credentials. They will no longer be visible!
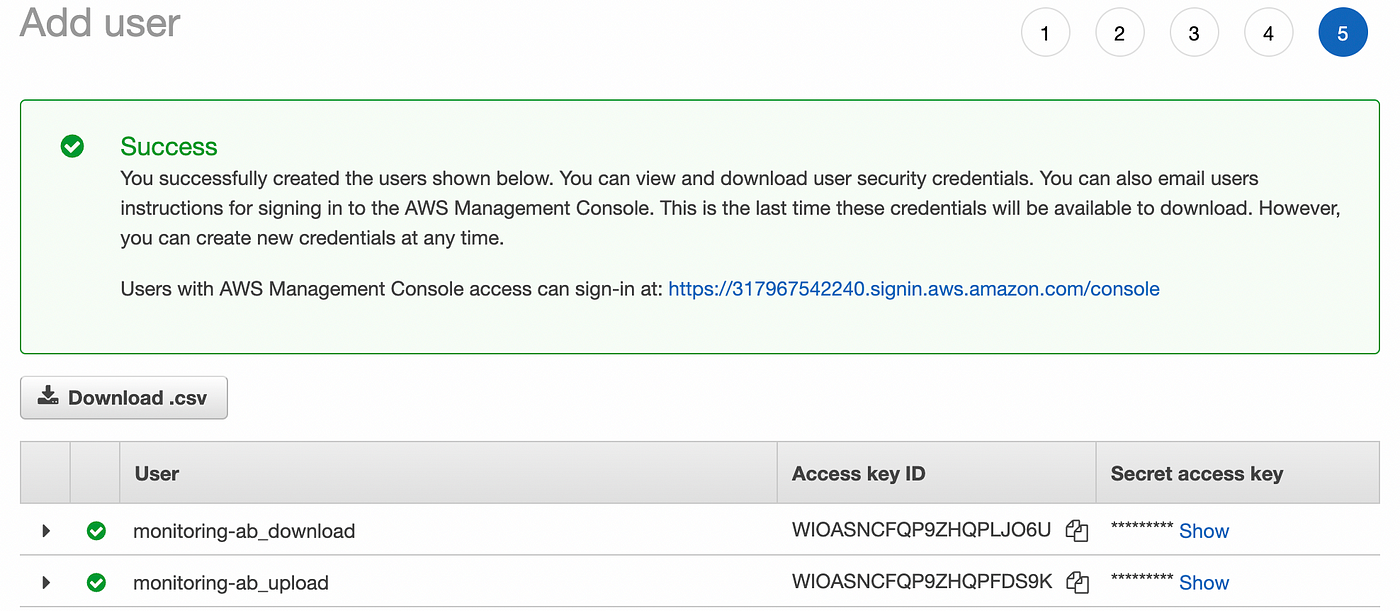
Those credentials will be used in Unity when the S3 client is created:
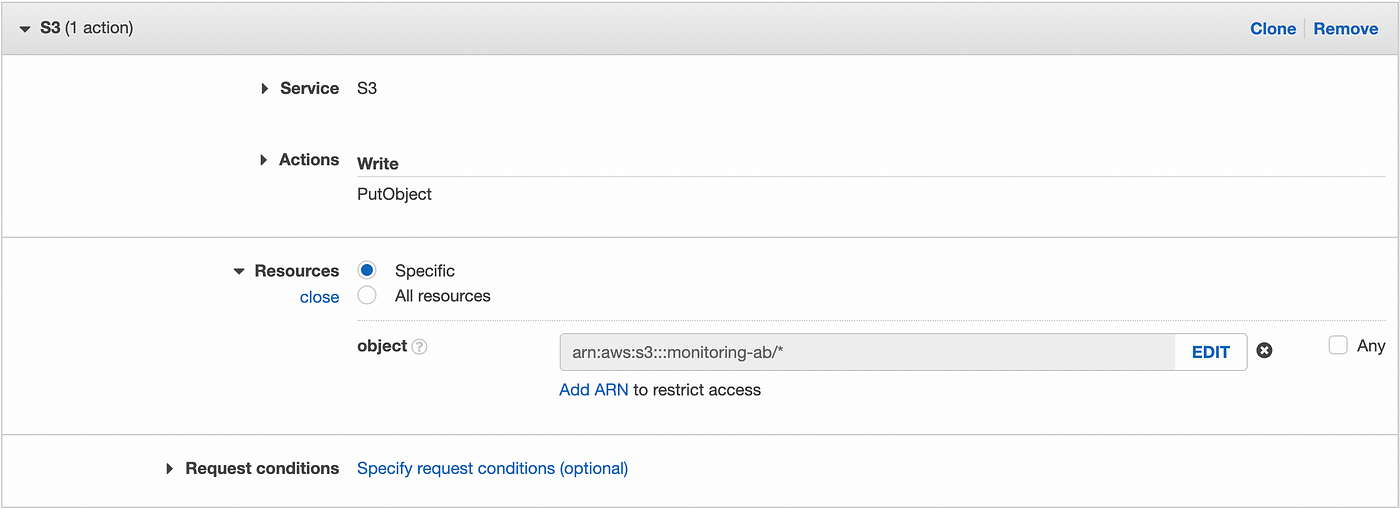
Then, we need to create a policy for each user. The policies will allow the user to perform actions on a specific bucket (monitoring-ab in my case). For this project, it is more convenient to create inline policies and not managed policies since they will be an inherent part of each user and will not be reusable. You can check the IAM documentation for more details.
So we will create an inline policy for each user. To achieve it, click on the “Add inline policy” button in the user details screen.

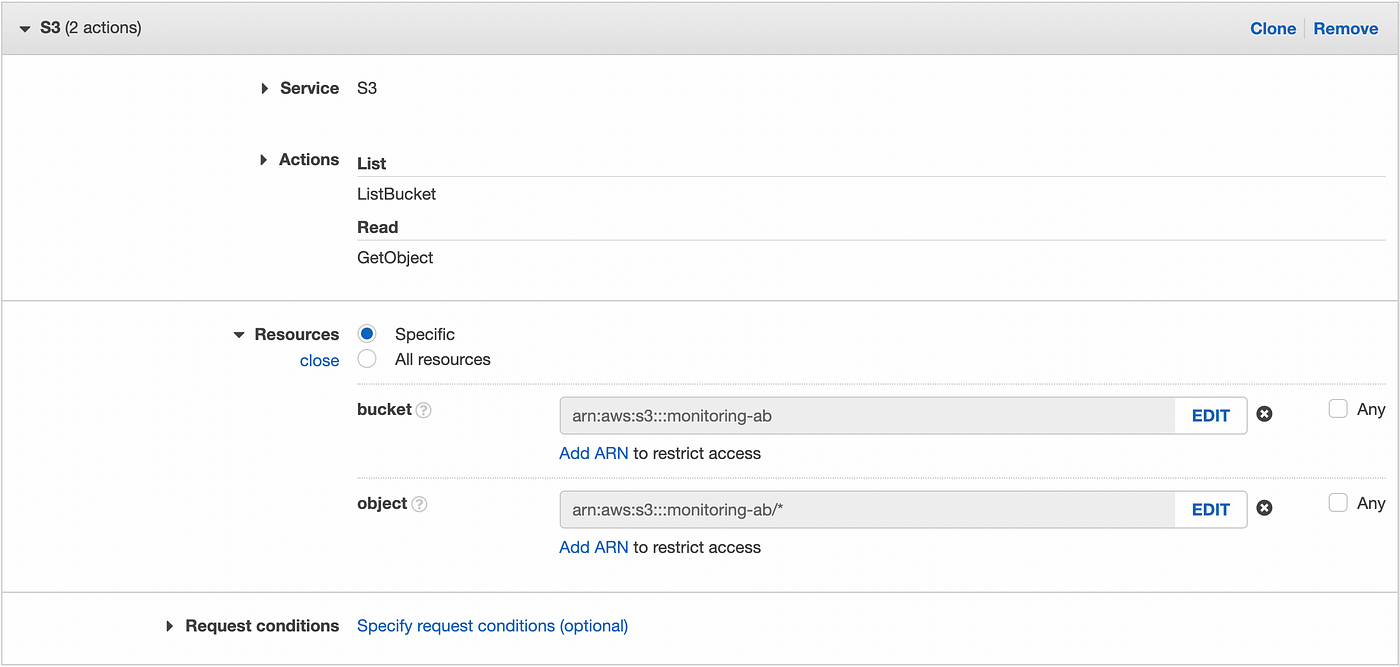
For the download user, we create a policy with the ListBucket and GetObject permissions for the specific bucket monitoring-ab.
For the upload user, we create a policy with the PutObject permission for the specific bucket monitoring-ab.
DynamoDB
In the DynamoDB console, create a new table with appId as the partition key:
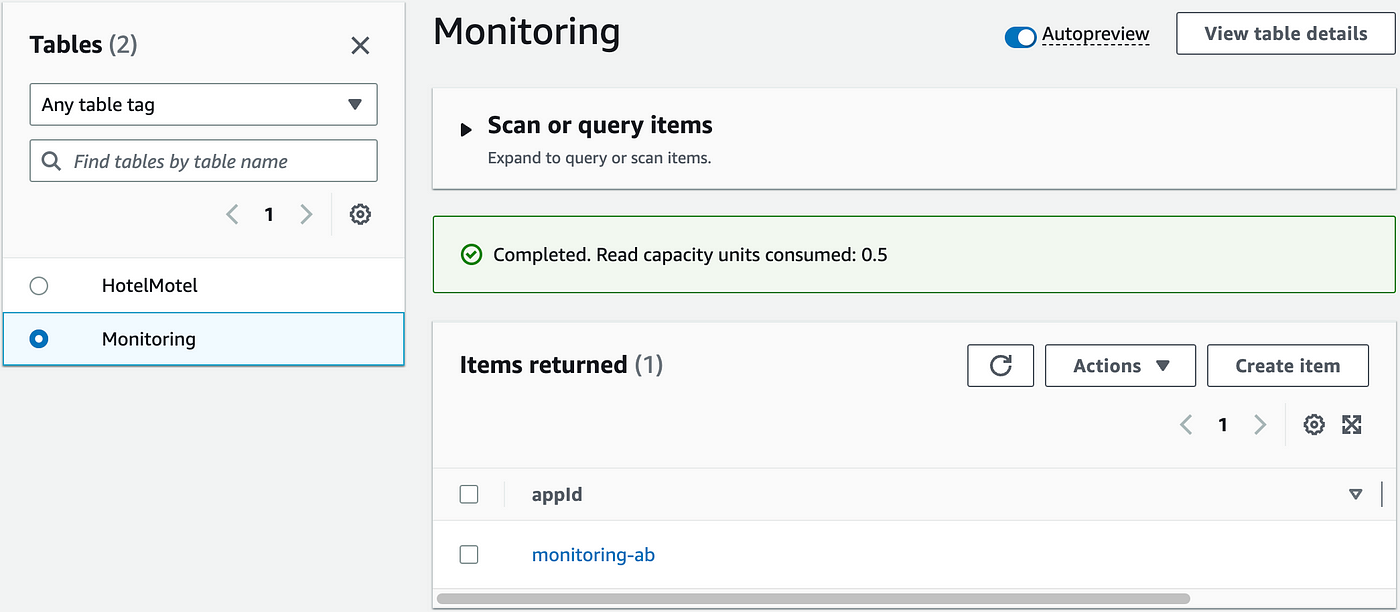
Then create an item related to the name of the S3 bucket and an array with the Firebase devices tokens:

Lambda
➡️ Lambda layer:
Before writing the Lambda function, we must load the Firebase Python library in a Lambda layer. The library handles Python >=3.7, so we will work with the most recent version of Python supported by Lambda, Python 3.9. We could upload the library along with the code, but by embedding it in a layer, we could reuse the Firebase library in other projects and focus on the code.
A great tip for building a Lambda layer is first to install the required libraries in a new local environment. I recommend using PyCharm Community which integrates local virtual environments. The only thing you have to do is create a new project along with a new associated virtual environment.
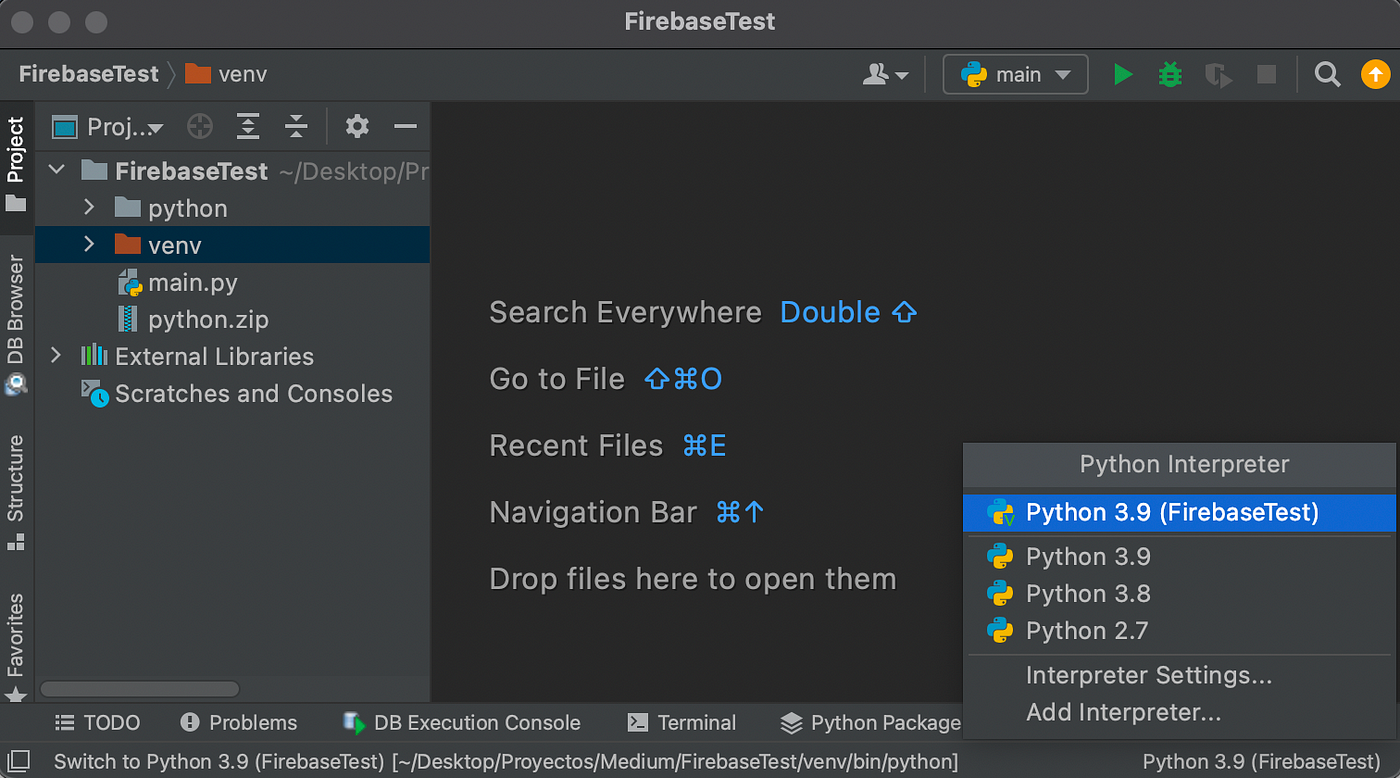
So in a new Python 3.9 environment, we will first update PIP, the Python package manager, and then install the Firebase library thanks to the following commands in the PyCharm terminal:
Once installed, you can visualize the Firebase library and all its dependencies in the venv folder of your project:
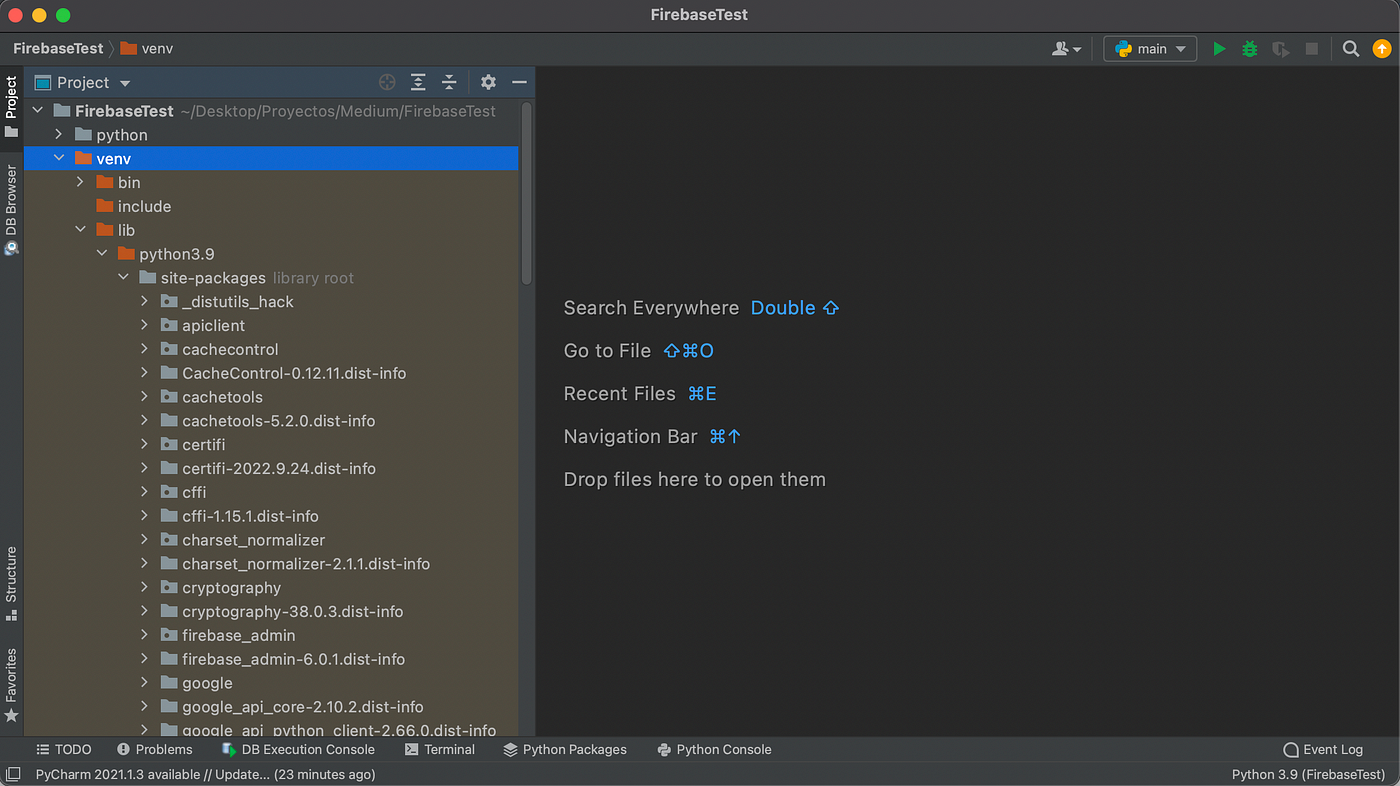
It looks good! The next step is copying the lib folder contained in the venv folder to a new folder called “python” and, finally, zip it.
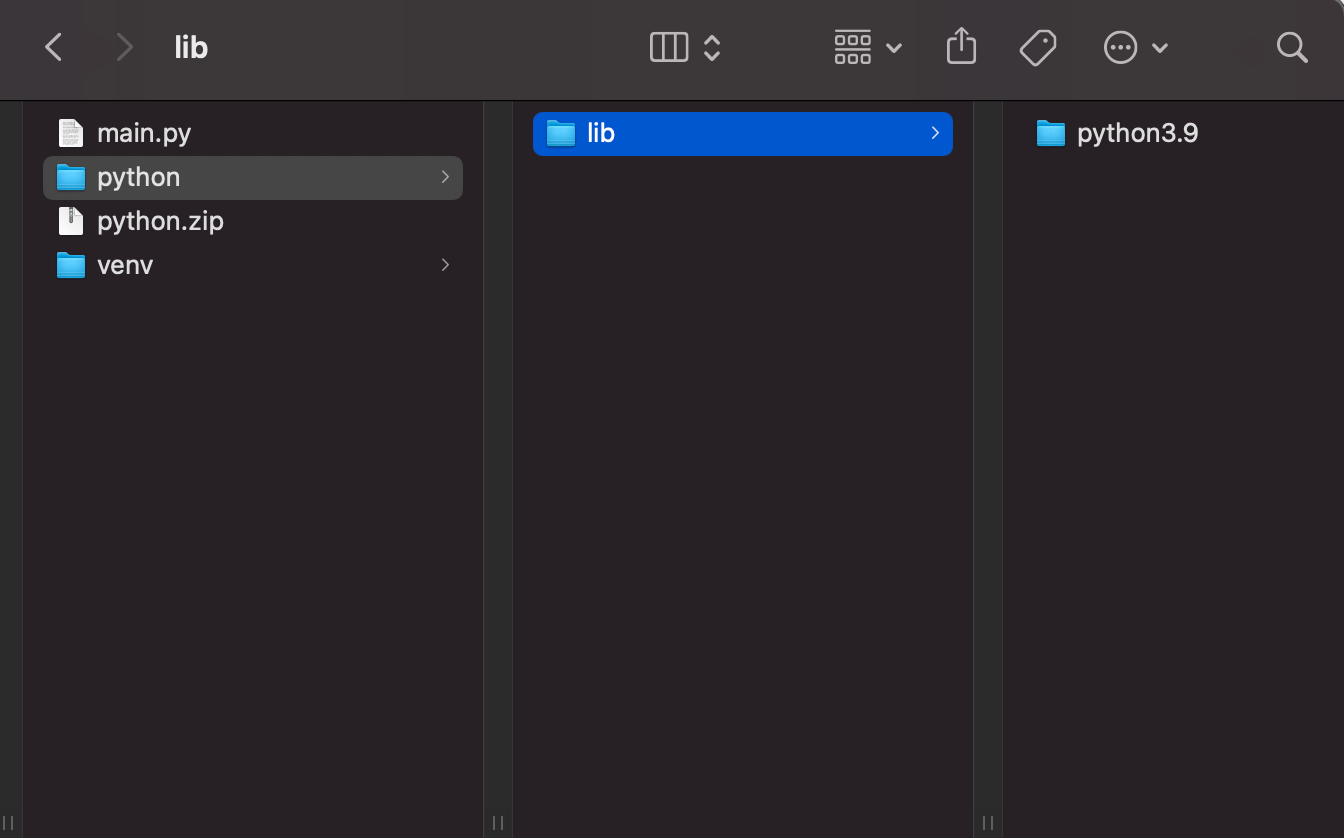
We are almost done! Now, we log in to the AWS console, create a new Lambda layer for Python 3.9, and upload the zip file.
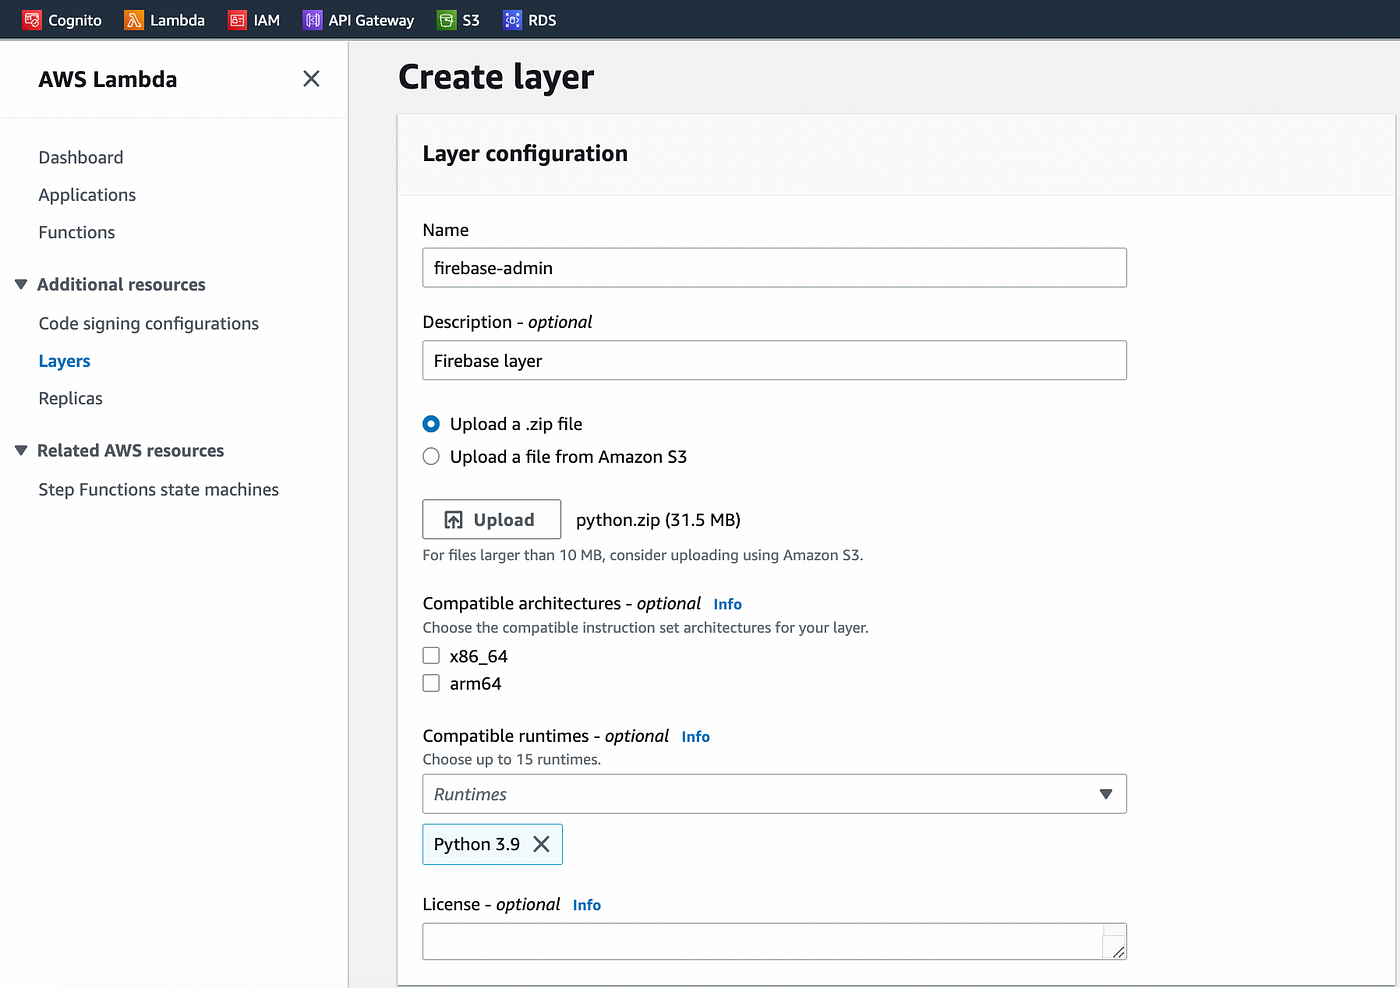
Our layer is ready to be used!
➡️ Lambda function:
This may be the most exciting part! Our Lambda layer is ready, and we can now send messages to Firebase within a Lambda function.
First of all, we will create a Lambda function for Python 3.9.
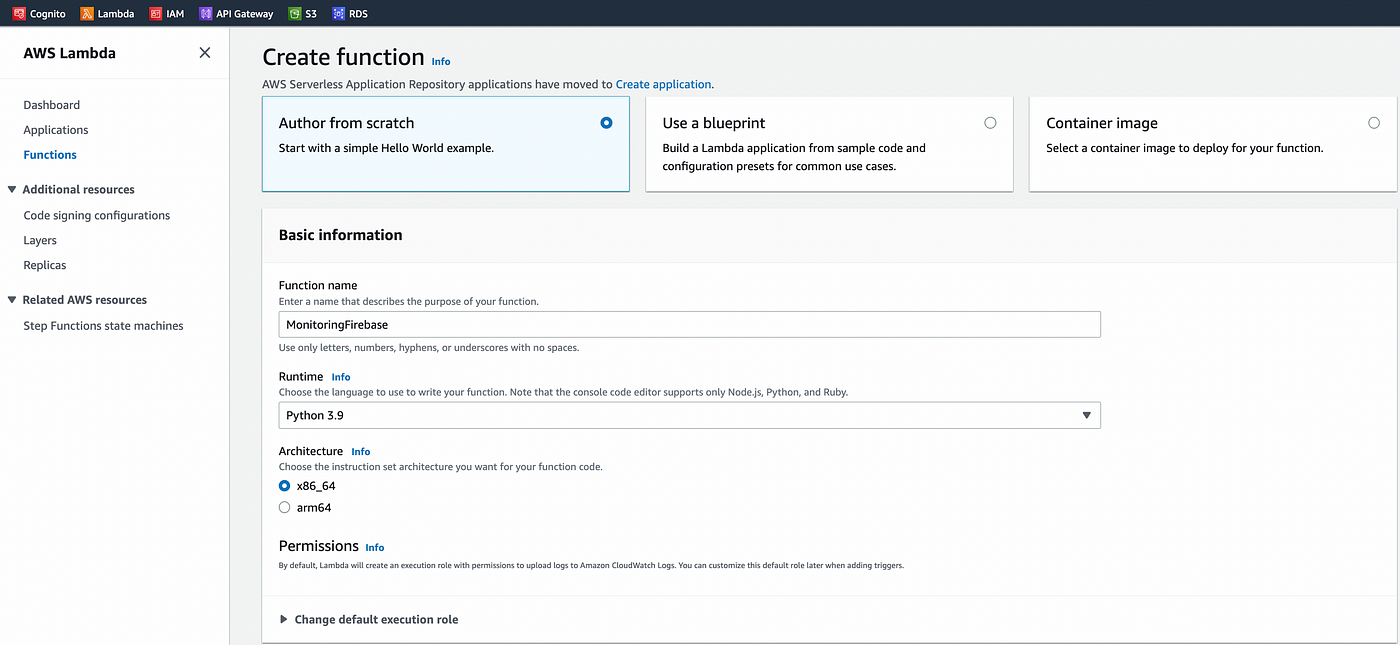
In the new Lambda function created, don’t forget to add the firebase layer:

Then, we go back to the S3 console and create an S3 event so that the new Lambda function will be triggered after each file uploads in the bucket. The Lambda function will be called after a “Put” event is detected on the bucket:

Go back to Lambda; we can see that the S3 event has been taken into account, and the layer has been added:

And here is the function:
Notes:
- To retrieve the credentials of your Firebase project, you will first have to create a private key in JSON format. This can easily be done in the project settings as indicated in the firebase-admin documentation. Then, you can load the credentials as a local file in your Lambda function.
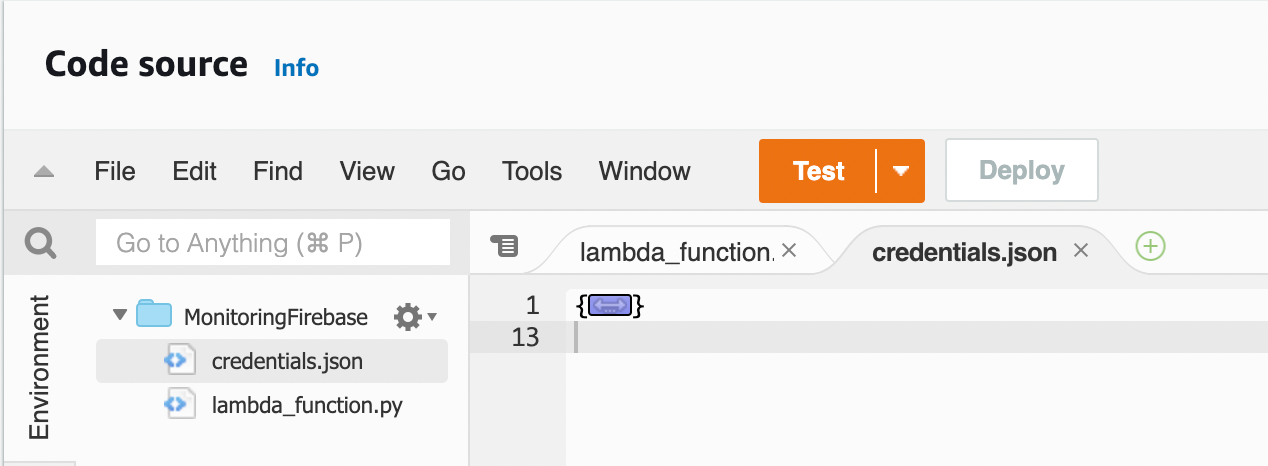
- We get the camera and bucket names from the S3 event. You can find the detailed structure of an S3 event and a great example of implementation in Python in the AWS documentation.
- We use the unquote_plus function of the urllib library to parse the camera and bucket names.
- We create a new Firebase message thanks to the MulticastMessage class, and we send the message thanks to the send_multicast function. You can find great examples of the firebase-admin function implementations on Firebase’s GitHub repository.
Final result
Well, we can now visualize the final result! For this test, I placed two cameras on my terrace while my dogs were sleeping in the bedroom, and I called them. I activated the movement detection only for the camera focusing on the dogs.
In the Desktop app, we can see Oreo and Simba coming to me from the bedroom:
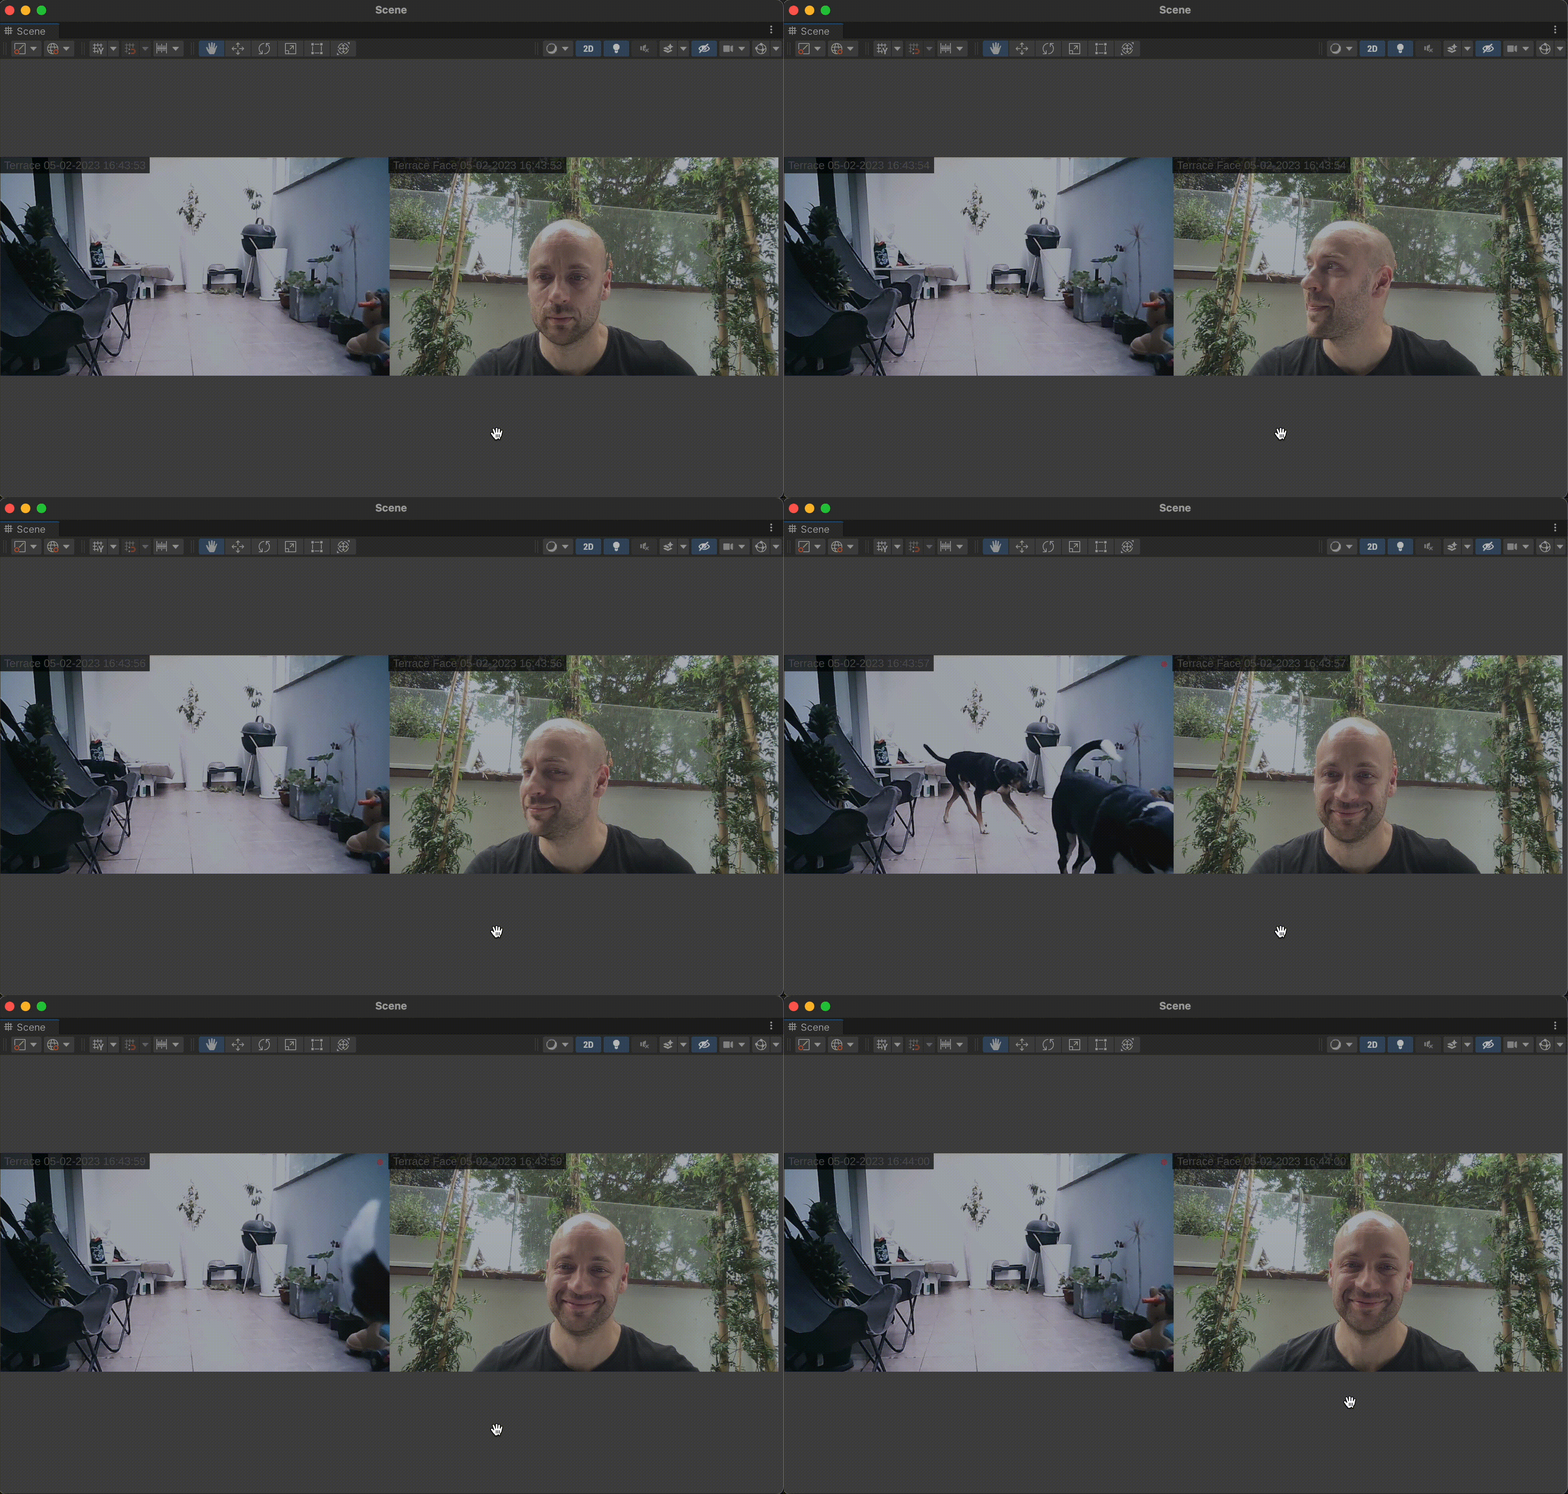
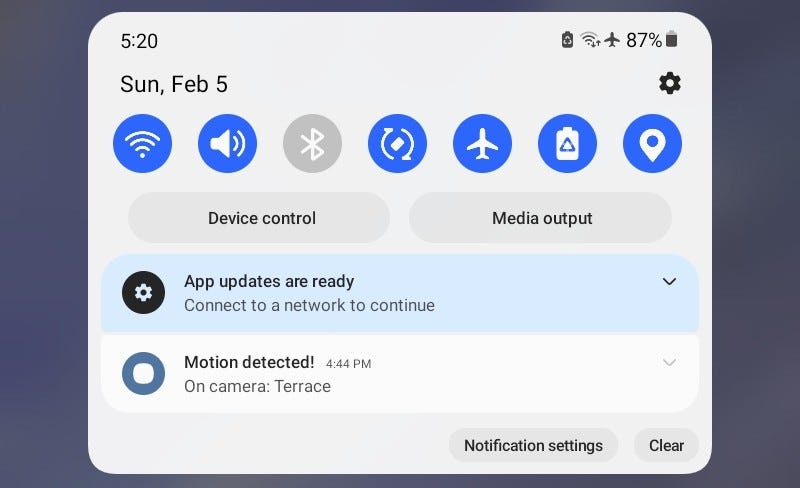
Movements have been detected, and a short video has been created (You can observe a red circle on the first cam when the video is being recorded). Once the video was uploaded, I received a notification on my mobile device:
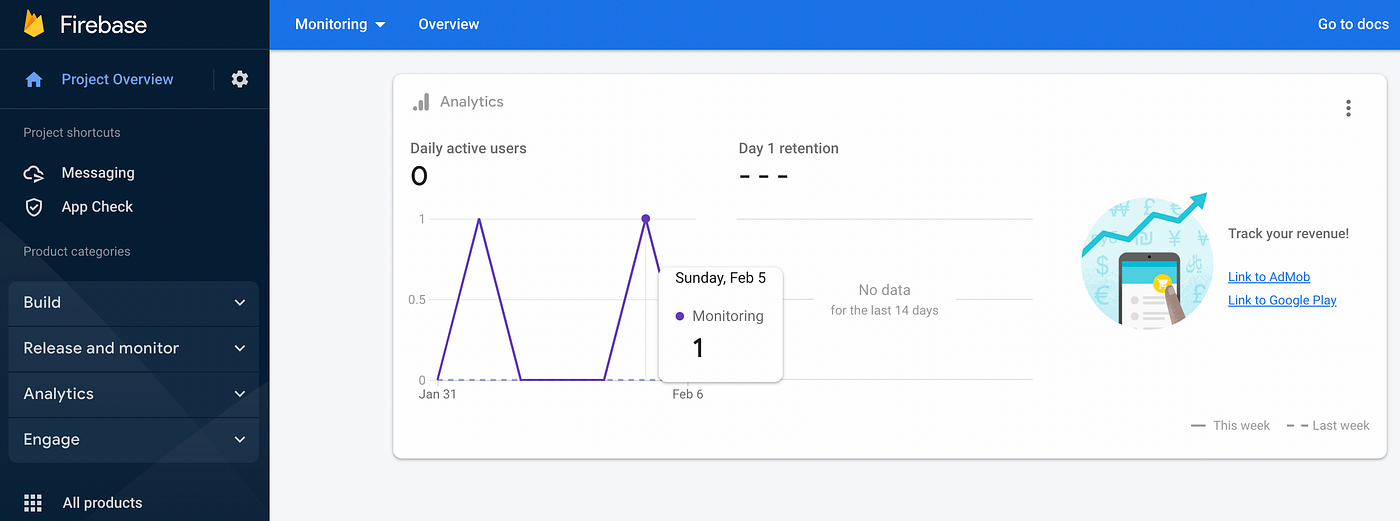
If we check the Firebase console, we can see that the message has been sent successfully:
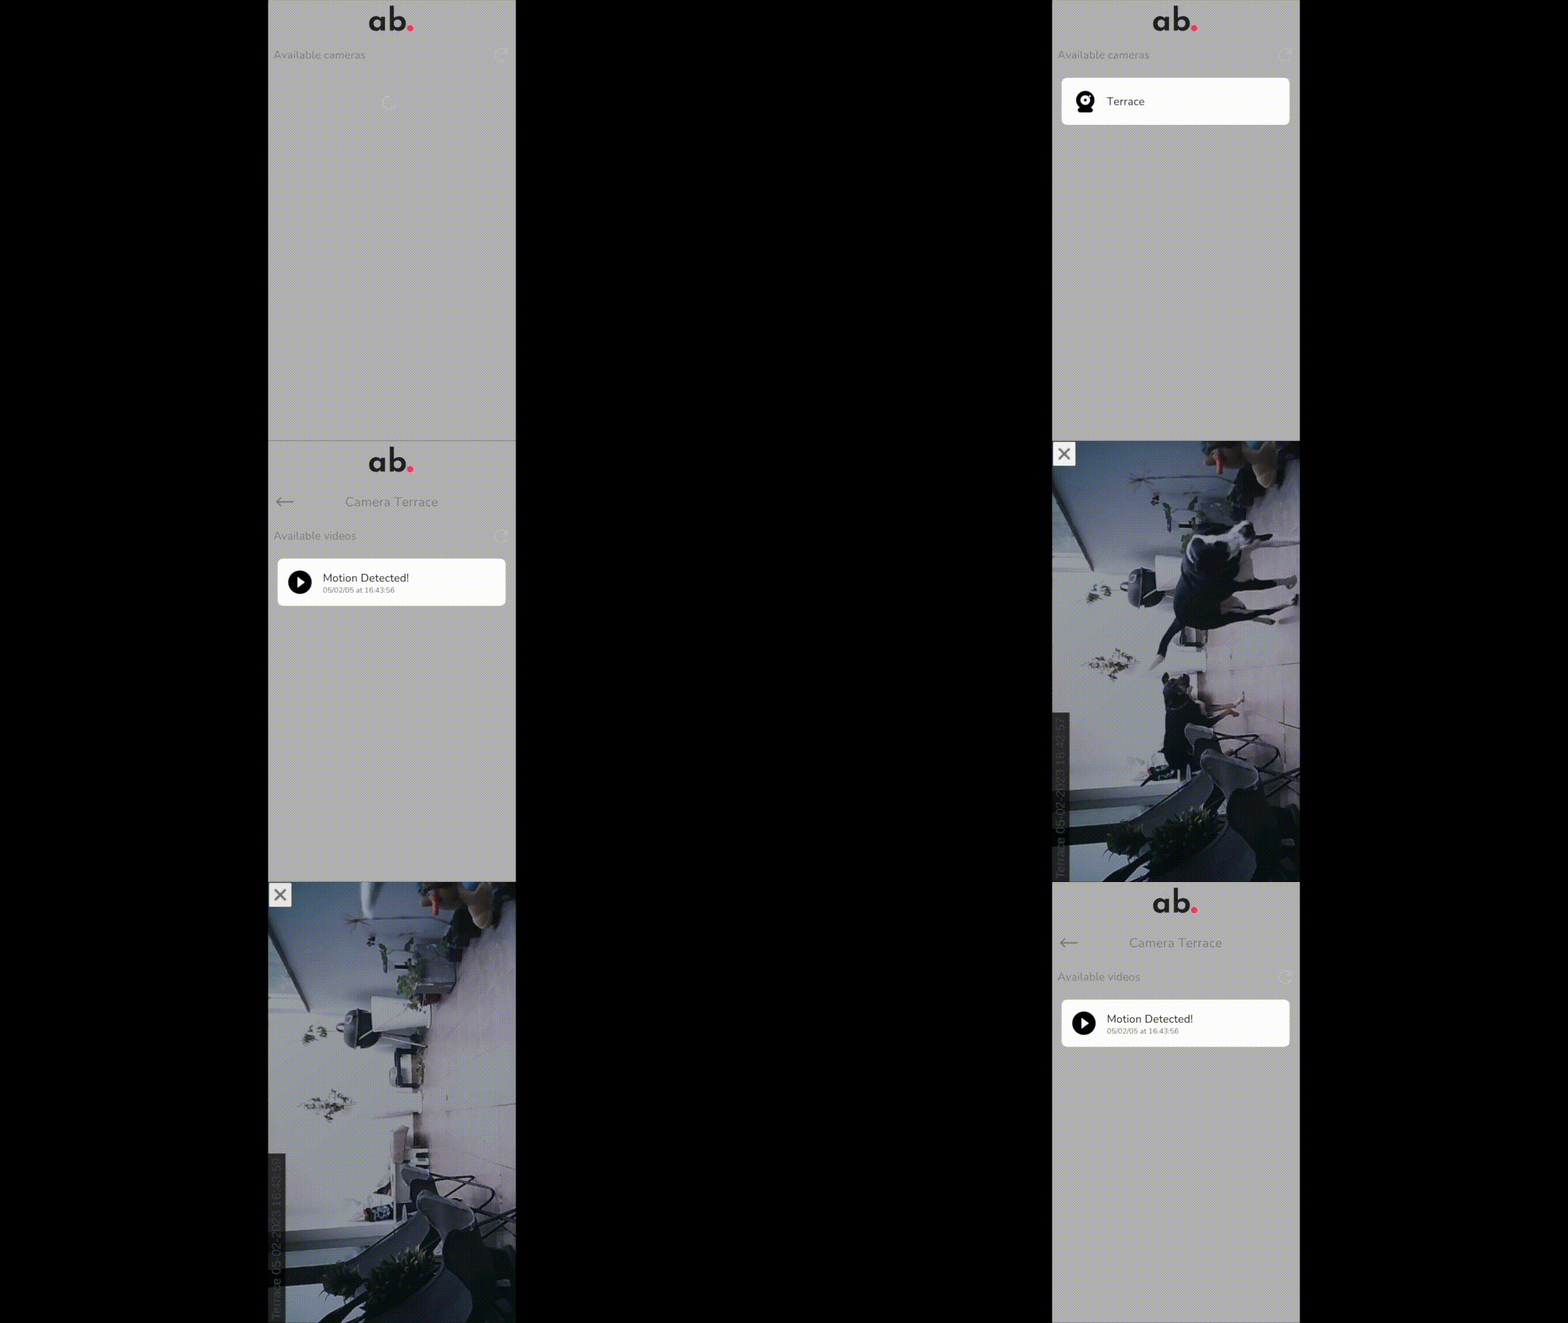
I can now open the mobile app and watch the video recorded:
Costs
This is an update! After publishing this article, Seth Wells made an excellent observation in the comments section: what about the costs? Let’s do the exercise with the most pessimist hypothesis.
The system I designed has a minimum recording interval. A big interval would make the whole system inefficient, and a too-small interval would make it uncomfortable (receiving a notification every minute can be bothering). So let’s talk about an interval of 5 minutes.
Based on this value, supposing that there always is movement on cameras, we would have 24×60/5 = 288 videos a day, around 9,000 videos a month. The size of a video file can vary depending on the resolution you want. Let’s talk of 1MB videos for 10 seconds recorded. Now let’s check the costs with the AWS Pricing Calculator.
- IAM: IAM is free to use.
- S3: This is the core service of our system. With 9GB of data by month, 9,000 put requests, 1,000 list requests (when a user opens the client app, hypothetical), and 1,000 get requests (when a user downloads a video, hypothetical), we get a bill of 0.26 USD by month, 3.12 USD by year.
- Lambda: With 9,000 requests a month, an average of 3 seconds by request, and 128MB of memory allocated, we have a bill of 0.00 USD, good news!
- DynamoDB: DynamoDB is here underused: we don’t write in any table, and we have a read request every 5 minutes. Cost: 0.00 USD.
- Firebase: Firebase Cloud Messaging is absolutely free.
Total: 0.26 USD by month, 3.12 USD by year with a pessimistic hypothesis. We can safely say that our system is affordable!
Closing thoughts
In this article, we had the opportunity to see how to build an entire cloud architecture and how to call an external messaging service (Firebase) from it. We also could build two Unity3D apps that directly interact with AWS thanks to the .NET SDK. Furthermore, we could evaluate the cost of the entire system thanks to the AWS Calculator.
Every code of this article has been tested using Unity 2021.3.3 and Visual Studio Community 2022 for Mac. The mobile device I used to run the Unity app is a Galaxy Tab A7 Lite with Android 11.
All ids and tokens shown in this article are fake or expired; if you try to use them, you will not be able to establish any connections.
You can download the Unity packages of the Desktop app and the client app specially designed for this article.
A special thanks to Gianca Chavest for designing the awesome illustration.
